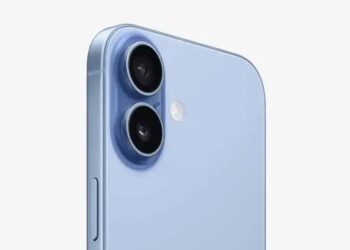
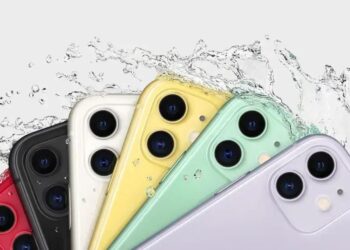
Você já se pegou pensando se aquele iPhone seminovo está realmente em boas condições? Com o checklist iPhone seminovo, é possível evitar dores de cabeça e garantir que o aparelho escolhido vale o investimento. Afinal, ninguém quer surpresas desagradáveis depois da compra, não é? Este guia vai ajudar você a identificar todos os detalhes essenciais antes de fechar negócio, desde a procedência até funcionalidades específicas.
Vamos passar por passos claros para testar cada aspecto do dispositivo e garantir que tudo está funcionando como deveria. Você vai entender quais sinais observar na bateria, na tela, nos botões e muito mais. Se quiser fazer uma compra consciente e segura, acompanhe o texto e veja como conferir cada item passo a passo com exemplos práticos. Preparado para não errar na escolha? Continue lendo e descubra como tomar a decisão certa.
Verificação da Procedência: A Segurança em Primeiro Lugar
When considering an iPhone seminovo (used iPhone), checking its provenance is the fundamental step to ensure the device is genuine, legally available, and free of complications. For technical professionals such as video editors, musicians, or software developers who rely heavily on their smartphones, trusting the source of their device prevents costly disruptions in daily workflows.
The provenance verification involves investigating the history of the device—its origin, seller authenticity, and prior usage. Since iPhones are highly coveted, the market for refurbished or secondhand devices can attract fraudulent sellers. Therefore, understanding how to decode serial numbers, checking for locks or blacklists, and verifying legal ownership is essential.
Key Points in Verifying iPhone Provenance
One of the most reliable ways to confirm an iPhone’s background is through the device’s unique identifiers: the IMEI (International Mobile Equipment Identity) and the serial number. These numbers reveal crucial data about the phone’s model, manufacturing date, warranty status, and whether it is reported as lost or stolen.
Requests for the IMEI and serial number should be standard before any purchase. You can access these via the device settings or by entering *#06# on the phone’s keypad. Then, cross-check these numbers using Apple’s official support site or third-party IMEI lookup services designed to detect blacklist status and authenticity.
Apple devices also support activation lock—a security measure linked with iCloud accounts. If the phone is still connected to the previous owner’s Apple ID, the new user might face permanent lockout, rendering the iPhone unusable. Therefore, confirming if the Find My iPhone feature is disabled is crucial.
Steps To Check iPhone Provenance
- Request the IMEI and serial number of the device from the seller.
- Verify the numbers on Apple’s official website to confirm model and warranty details.
- Use a reliable third-party IMEI checker to detect blacklist or theft reports.
- Inspect the physical condition to match the reported model and serial number engraving.
- Confirm that the device is not locked by iCloud or carrier locks.
- Ask for an original purchase receipt or proof of ownership if possible.
- Test the phone for signs of tampering or unauthorized repairs.
- Avoid buying iPhones offered at unusually low prices.
- Prefer buying from trusted retailers or certified resellers.
- Consider using escrow services or payment methods that protect the buyer.
For professionals relying on their mobile ecosystem integration and communication tools, purchasing a device with questionable provenance risks losing valuable data, access to software updates, and essential app functionality, especially for demanding uses like video editing or audio production.
Table: IMEI and Serial Number Checks Overview
| Check | Purpose | How to Perform |
|---|---|---|
| IMEI/Serial Verification | Authenticate model and warranty | Apple Support website or *#06# code |
| Blacklist Status | Check for stolen/lost reports | Third-party IMEI checkers (e.g., Swappa, IMEI.info) |
| Activation Lock Status | Ensure device is not linked to previous Apple ID | Attempt setting up a new Apple ID or ask seller to disable |
| Carrier Lock | Confirm phone is unlocked or compatible | Insert other carriers’ SIM cards and test connectivity |
| Proof of Purchase | Legal ownership confirmation | Request original invoice or receipt |
Taking these steps protects your investment, especially if your professional tasks depend on stable smartphone performance. Understanding and verifying an iPhone’s provenance preserves not only monetary value but also critical workflow reliability for tech-savvy users.
Condição Estética: Avalie a Aparência Geral
When purchasing a seminovo iPhone, especially for professionals such as video editors, audio producers, and developers who rely on their devices’ reliability and aesthetics, assessing the device’s esthetic condition is crucial. The physical state of the phone not only reflects its previous usage but also impacts its usability and comfort during prolonged professional use. Scratches, dents, discolorations, or screen damage can interfere with the device’s functionality and overall user experience.
The esthetic evaluation begins with a meticulous visual inspection. Professionals must examine every angle and component, paying close attention to common wear areas like corners, edges, and the screen. For those whose work involves streaming or content creation, a clean and intact device reflects professionalism, while significant physical flaws can reduce the device’s value and durability.
Key Areas to Inspect in the Aesthetic Condition
Start by checking the screen and glass surfaces. Look for scratches, cracks, or dead pixels, which can affect touch sensitivity and display quality. Screen issues can also cause frequent eye strain to users who depend on detailed visual output for editing tasks.
Next, inspect the body frame. Aluminum or stainless-steel edges might present dents or corrosion from past impacts or exposure to moisture. Such damage may indicate harsher treatment of the phone, possibly leading to internal hardware issues. Consider also the back panel, which may have scratches or discoloration that hint at physical stress.
Buttons and ports deserve particular attention. Check if the power and volume buttons are firm and responsive, as these are critical in everyday workflow. Ports such as the Lightning connector should be free from dust and corrosion to maintain stable connections, important for syncing or charging during long editing sessions.
- Examine the screen under different lighting to detect micro scratches or cracks.
- Use a magnifying glass or macro camera to spot subtle damages.
- Ensure the case or frame is free from deep dents or bends that can compromise internal parts.
- Test every physical button to confirm tactile feedback and responsiveness.
- Verify the screen’s brightness uniformity to detect discoloration or dead pixels.
- Look for fingerprints or residues indicating prior repairs that may not be visible at first glance.
- Check for liquid damage indicators, usually found in the SIM tray slot or near the charging port.
- Inspect the speakers and microphones for cleanliness and absence of debris.
- Ask the seller about any past repairs or screen replacements to understand the device’s history.
- Compare the device’s condition with online reviews or photos of brand-new models to identify deviations.
Esthetic Condition and Professional Use
For video editors and designers, the screen esthetics correlate directly with the color accuracy and clarity they require. A scratched or clouded display can distort colors and degrade image fidelity, impacting editing precision. On the other hand, audio producers need unobstructed speaker grills and microphone openings for clear sound capture and playback.
Additionally, a physically compromised casing can affect internal hardware components due to impacts or moisture, posing risks to the device’s processing power and storage stability. Developers running high-demand apps or 3D artists editing on mobile need structural integrity to ensure the phone performs optimally without interruptions.
| Esthetic Feature | Impact on Professional Use | Recommended Inspection Method |
|---|---|---|
| Screen Condition | Affects visual clarity, touch response, and color accuracy | Visual inspection against light, touch responsiveness test |
| Body Frame | Structural integrity, protection of internal hardware | Physical examination for dents, bends, and corrosion |
| Buttons | Operational reliability for quick controls | Press test for tactile feedback and durability |
| Ports | Charging and data transfer stability | Visual check and functional testing with cables |
| Surface Cleanliness | Professional appearance, hygiene | Wipe test and residue check |
Step-by-step Guide to Evaluate Aesthetic Condition
- Clean the device with a microfiber cloth to remove fingerprints and dust.
- Examine the screen under sunlight and artificial light for scratches or cracks.
- Test touch screen responsiveness by opening various apps and menus.
- Inspect the frame for dents, bends, or signs of corrosion carefully.
- Press all physical buttons multiple times to validate tactile feedback.
- Insert and remove SIM card to check for liquid damage indicators.
- Connect charger and headphones to verify port integrity.
- Listen to speakers and test microphones by making calls or recording audio.
- Request disclosure from the seller on any prior damage or repair history.
- Take photos for later comparison or consultation with specialists if necessary.
Saúde da Bateria: O Coração do Seu iPhone
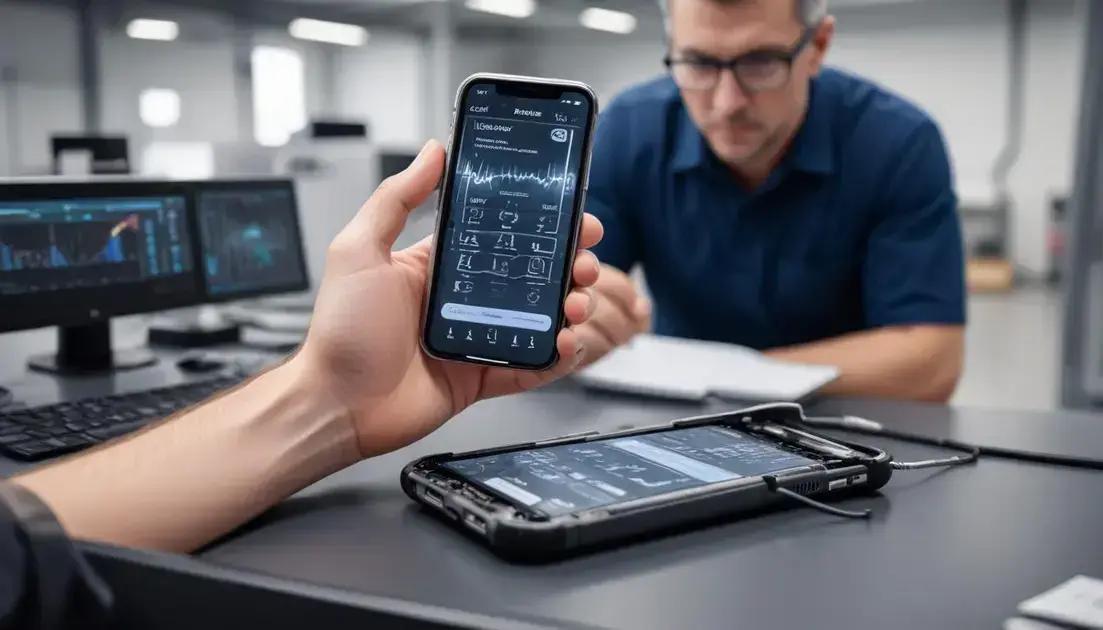
The battery health of an iPhone seminovo is one of the most critical components to evaluate, especially for tech professionals such as video editors, musicians, developers, and 3D artists who depend heavily on their device’s uptime and performance. Over time, lithium-ion batteries degrade and may not hold a charge as efficiently, which could interrupt workflows and reduce productivity.
Apple devices provide detailed battery health information natively in the iOS settings. This data helps users understand capacity relative to the battery’s original state, maximum performance capability, and if a replacement is recommended. For professionals who need uninterrupted usage, knowing these details can prevent unforeseen shutdowns during high-demand tasks.
Understanding Battery Health Metrics
Battery health is expressed as a percentage called Maximum Capacity, which compares the current battery capacity against the original capacity when the device was new. A high percentage close to 100% indicates a healthy battery, while lower values suggest deterioration.
Another important metric is Peak Performance Capability. When this is active, the iPhone can deliver its full potential. However, when the battery degrades, iOS can apply performance management to avoid unexpected shutdowns, which may throttle CPU speed and impact demanding apps like video editors or intensive coding environments.
Battery life is especially crucial for professionals working on-the-go, such as streamers or 3D artists attending events or studios without convenient charging points. A weak battery reduces total usage time and increases the need for charging interruptions, which can disrupt creative flow and deadlines.
Checklist to Evaluate iPhone Battery Health
- Check the battery maximum capacity percentage in Settings > Battery > Battery Health.
- Look for warnings about battery condition or recommendations to replace the battery.
- Observe any reports of unexpected shutdowns or performance throttling.
- Test real-world battery longevity by simulating typical use cases like video playback or photo editing.
- Use third-party apps such as CoconutBattery (macOS) or iMazing (Windows/Mac) for advanced battery diagnostics.
- Confirm that charging and discharging happen without excessive heat generation.
- Inspect the charger and cable to ensure charging stability and correct amperage.
- Avoid phones with swollen batteries or visible deformation signs.
- Request the battery replacement history if available, and verify it was done with genuine Apple parts.
- Prefer phones with battery health above 85% for professional use.
Various tools are available for professionals who require deeper battery analysis. These can display cycle count—the number of complete charge and discharge cycles a battery has undergone—and the battery’s internal resistance, both suggesting the battery’s degradation level and remaining lifespan.
| Metric | Definition | Impact on Usage |
|---|---|---|
| Maximum Capacity (%) | Battery charge capacity relative to when device was new | Lower capacity means shorter battery life |
| Peak Performance Capability | Status indicating if battery supports optimal performance | Performance throttling might occur if degraded |
| Cycle Count | Number of full charge cycles experienced by the battery | Higher count correlates with battery wear |
| Battery Temperature | Current operating temperature of the battery | Excessive heat reduces battery lifespan |
Step-by-step Guide to Test Battery Health of an iPhone Seminovo
- Navigate to Settings > Battery > Battery Health and record the maximum capacity percentage.
- Ensure the device shows no “Service” warnings about battery condition.
- Perform a real-world test by playing a video at 50% brightness and note the battery drain over 30 minutes.
- Use diagnostic software on a computer for detailed metrics such as cycle count.
- Check for excessive heating during charging or use, which could indicate battery issues.
- Evaluate if performance throttling has been applied by monitoring device speed under load.
- Inspect for visible signs of battery swelling by carefully looking at screen edges and back panel.
- Request history of battery replacements and verify authenticity of the parts.
- Compare battery longevity with official Apple battery standards for the device model.
- Confirm charging accessories are working correctly and providing stable power input.
Tela e Touch: Resposta Perfeita ao Seu Comando
The screen and touch responsiveness on a seminovo iPhone are crucial aspects to evaluate, especially for professionals such as video editors, musicians, developers, and 3D artists who rely on precise input and visual clarity. The display is the gateway for user interaction, and any flaw or lag in touch response can disrupt workflows and creative processes. Given the iPhone’s role in managing complex apps, multitasking, and creative suites, testing these components goes beyond just aesthetics.
An iPhone’s screen quality includes resolution, color accuracy, brightness, and the touch sensor’s ability to register commands reliably. For digital artists or video editors, color calibration is particularly important as inaccurate colors can misrepresent final output. Additionally, smooth multi-touch functionality ensures seamless navigation through professional applications.
Evaluating the Screen and Touch Responsiveness
First, examine the screen for any visible damage such as scratches, cracks, or discoloration. Minor scratches don’t typically affect display functionality but can degrade visual experience and potentially hinder touchscreen performance over time. Cracks or broken glass usually indicate a more serious issue potentially affecting internal components.
Brightness should be checked at various levels and angles. Professionals working with graphics or editing software often prefer high brightness and consistent color accuracy to avoid misinterpretations of their projects. Use color test images or apps to identify dead pixels—spots on the screen that do not display correctly or at all.
Touch responsiveness testing involves verifying whether all touch inputs are registered accurately without delay, jitter, or ghost touches (false inputs). This is critical for tasks involving quick gestures or precise positioning, such as audio editing timelines or 3D modeling controls.
- Inspect the screen closely under different lighting conditions for damage or discoloration.
- Run a pixel test using diagnostic apps or websites to detect dead or stuck pixels.
- Observe screen brightness and color consistency at high and low brightness.
- Test multi-touch by using apps that detect multiple simultaneous touch points.
- Swipe through menus and type on the virtual keyboard to check for lag or unregistered touches.
- Perform pressure sensitivity tests if the device supports 3D Touch or Haptic Touch.
- Check for any flickering or screen artifacts that can indicate hardware problems.
- Look for signs of prior screen replacements which might affect display quality.
- Test in landscape and portrait mode to evaluate orientation and touch sensor responsiveness.
- Ensure that the oleophobic coating (which repels fingerprints) is intact to maintain smooth finger glide.
Comparison Table: Key Screen and Touch Features Impacting Professional Use
| Feature | Importance for Professionals | Inspection Method |
|---|---|---|
| Screen Resolution | Determines sharpness and clarity in editing | Visual inspection and specification check |
| Color Accuracy | Crucial for video editors and designers | Use color calibration apps and physical light test |
| Brightness Levels | Ensures visibility in various lighting conditions | Adjust brightness and observe consistency |
| Multi-Touch Responsiveness | Essential for gestures and software control | Use multi-touch testing apps |
| Presence of Dead Pixels | Can disrupt visual flow and precision | Pixel test using diagnostic tools |
| Touch Lag | Impact on workflow speed and accuracy | Perform quick inputs and observe reaction time |
| Pressure Sensitivity | Important for 3D Touch supported apps | Test via pressure-sensitive apps |
| Oleophobic Coating Condition | Improves finger glide and touch feel | Inspect screen surface feel and fingerprint marks |
Step-by-Step Guide to Test Screen and Touch Response on a Seminovo iPhone
- Clean the screen with a microfiber cloth to remove residue and fingerprints.
- Visually inspect the screen under different light sources for cracks, scratches, or discoloration.
- Run a pixel test using online tools or dedicated apps to identify dead pixels.
- Adjust brightness to minimum and maximum, observing color fidelity and consistency.
- Operate apps requiring multi-touch and verify that all inputs register without delay.
- Open a note-taking app and type quickly to check for touch lag or missed touches.
- Use apps or built-in features to test pressure sensitivity if supported by the model.
- Test orientation changes and ensure the touchscreen adjusts correctly.
- Check the oleophobic coating by noting how the finger glides and the presence of fingerprint smudges.
- Ask the seller about previous screen repairs or replacements for transparency.
Câmeras (Frontal e Traseira): Qualidade em Cada Clique
The quality of front and rear cameras on a seminovo iPhone is of utmost importance for professionals such as video editors, photographers, musicians creating music videos, developers testing camera features, and 3D artists using augmented reality apps. The cameras not only capture crucial moments but also serve as essential tools in content creation, live streaming, and project documentation. Therefore, thoroughly testing both the front (selfie) and rear (main) cameras is non-negotiable when purchasing a used iPhone.
Camera performance depends on various factors such as lens condition, sensor functionality, image stabilization, and software optimizations. A damaged lens or malfunctioning sensor can result in blurry images, improper focus, or color distortion, severely compromising professional work. Additionally, features like HDR (High Dynamic Range), Night Mode, and Portrait mode must be tested to ensure proper functionality.
Assessing the Rear Camera
The rear camera is typically the most sophisticated on iPhones, equipped with multiple lenses on newer models. These can include wide, ultra-wide, and telephoto lenses, each catering to different shooting scenarios. For professionals editing video content or creating promotional material, these diverse focal lengths offer critical versatility.
Start by checking the outer glass lens for scratches or cracks. Even minor imperfections can degrade image quality or cause lens flare. Then, open the camera app and test each lens separately. Assess autofocus accuracy by focusing on objects at various distances and moving the phone slightly to see if the focus adapts smoothly.
Test video recording at various resolutions and frame rates, such as 4K at 60fps, to verify smoothness and absence of artifacts. Check for optical image stabilization by recording handheld footage and observing vibrations or shakiness. Also, evaluate advanced modes like night photography and slow-motion for proper software operation.
Evaluating the Front Camera
The front-facing camera has evolved significantly, supporting high-resolution selfies, Face ID recognition, and video calls—key for professionals streaming or creating personal brand content. Inspect the lens for damage and test for clarity in different lighting conditions.
Test Face ID functionality as it heavily depends on the TrueDepth camera system. It should recognize the user promptly under various angles and lighting without unnecessary retries. Additionally, test portrait selfies and video chat applications such as FaceTime or streaming software to confirm the camera quality and microphone synchronization.
- Inspect lens surfaces for scratches, cracks, or discoloration on both front and rear cameras.
- Test each rear camera lens (wide, ultra-wide, telephoto) individually in various lighting.
- Use autofocus on still images to check for quick and accurate focusing capabilities.
- Record videos at multiple resolutions/frame rates (e.g., 1080p, 4K, slow-motion) to evaluate recording quality.
- Test optical image stabilization by capturing handheld video and checking smoothness.
- Evaluate advanced photo modes: Portrait, Night Mode, HDR, and Panorama.
- Test front camera quality in soft and strong lighting, including Face ID performance.
- Use video call apps to assess front camera and mic synchronization.
- Compare captured photos and videos against similar models or new devices.
- Request information about past camera repairs or replacements for transparency.
Key Camera Specifications for Professional Use
| Feature | Significance | Testing Method |
|---|---|---|
| Lens Integrity | Ensures no optical distortions or blurring | Visual inspection for scratches; test photos for clarity |
| Autofocus Speed and Accuracy | Critical for sharp images and smooth videos | Focus at various distances and lighting conditions |
| Image Stabilization | Reduces blur and shaky videos | Record handheld footage and analyze stability |
| Color Reproduction | Accurate colors for professional editing | Compare images under controlled lighting |
| Low-Light Performance | Quality output in dim environments | Use Night Mode and low-light shots |
| Video Resolution & Frame Rate | Impact on video quality and smoothness | Record at varying resolutions and frame rates |
| Front Camera Clarity | Essential for streaming and video conferencing | Selfies and video calls testing |
| Face ID Functionality | User authentication and security | Test Face ID in different scenarios |
Step-by-Step Guide to Testing iPhone Cameras in a Seminovo
- Visually inspect both front and rear lenses for damage or dust deposits.
- Open the Camera app and test rear lenses individually by switching cameras.
- Take multiple pictures focusing on a variety of subjects at multiple distances.
- Record video clips at 1080p and 4K resolutions, checking for stability and clarity.
- Test advanced photo modes including Portrait, Night Mode, and Panorama.
- Switch to the front camera and repeat photo and video tests, checking for automatic exposure adjustments.
- Test Face ID recognition multiple times in different lighting and angles.
- Use video call apps like FaceTime to verify front camera functionality during streaming.
- Compare the image and video quality to sample media from a new or verified device.
- Confirm the absence of any alerts or pop-ups indicating camera hardware problems.
Top 10 Recommended iPhone Models in Brazil for Camera Performance
- iPhone 14 Pro: Approx. R$7,500 – Industry-leading camera system with pro-level videography features.
- iPhone 13 Pro: Approx. R$6,500 – Excellent cinematic mode and improved low-light shots.
- iPhone 12 Pro Max: Approx. R$5,800 – Stabilization and large sensor for superior image quality.
- iPhone 11 Pro: Approx. R$4,500 – Triple-camera system with reliable photo and video capture.
- iPhone SE (3rd Gen): Approx. R$3,200 – Budget-friendly with decent single-camera performance.
- iPhone XR: Approx. R$2,800 – Good for casual photographers, but lower specs than Pro models.
- iPhone 13: Approx. R$5,000 – Balanced camera features suitable for most professional tasks.
- iPhone 14: Approx. R$6,000 – Strong front and rear cameras with great consistency.
- iPhone 11: Approx. R$3,800 – Solid dual-camera system for photos and video.
- iPhone X: Approx. R$3,500 – Still capable but lacks latest computational photography improvements.
Choosing a seminovo iPhone with well-functioning cameras ensures you maintain professional-grade quality for your projects. Diligent testing helps avoid surprises and guarantees the device meets the high demands of technical users.
Botões e Conexões: Tudo Funcionando Sem Falhas
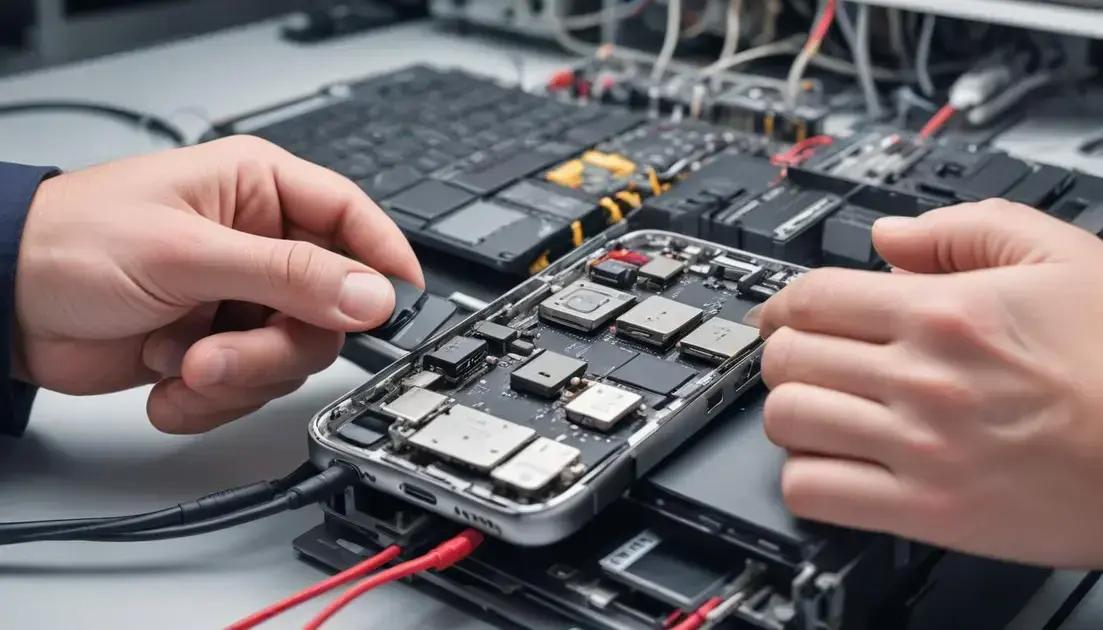
For professionals in video editing, music production, software development, 3D design, and similar fields, the reliability of the physical interface of a seminovo iPhone—specifically its buttons and connections—is vital. These hardware components are the primary means of interacting with the device and connecting with external peripherals, making their flawless operation essential to maintaining a smooth workflow and uninterrupted creative processes.
Each button on the iPhone, from the volume controls and mute switch to the power button and Home or Side button, must operate without glitches or excessive wear. Malfunctioning buttons can cause delays, prevent access to key functions like screen locking, volume adjustment, or activating voice assistants, and might necessitate costly repairs that disrupt work.
Similarly, connection ports such as the Lightning port or, in newer iPhone models, the USB-C port, serve critical roles in charging, data transfer, and peripheral connectivity. A dirty, worn, or damaged port can lead to intermittent charging issues or connection failures with important devices like external microphones, audio interfaces, or storage drives, directly impacting performance during live sessions or on-the-go edits.
Essential Checks for Buttons on a Seminovo iPhone
Start with a tactile and functional test of every physical button. They should offer responsive, consistent clicks without sticking or softness, as failing mechanics may signal underlying problems. The volume buttons and mute switch should adjust sound levels accurately and toggle silent mode without delay.
The power or Side button must instantly wake or lock the screen and enable accessibility features. If the iPhone has a Home button, it should be responsive to presses and, if equipped, the integrated Touch ID sensor should promptly recognize fingerprints.
Be vigilant for physical damages including loose buttons or uneven spacing indicative of previous repairs or damage. Buttons with excessive wear may cause unintended actions during professional work, resulting in lost data or interference during recording and broadcasting.
Verifying Connection Port Functionality
Ports are prone to debris buildup and mechanical wear from daily use. Inspect the port under good lighting for lint, dust, or bent pins which can obstruct proper connection. Cleaning with soft tools can sometimes help, but damaged pins require professional repair.
Test charging with an original or certified charger to ensure stable power delivery. Power fluctuations or failure to charge affect battery health and device availability, critical factors in time-sensitive tasks. Likewise, test data syncing and peripheral device compatibility by connecting to computers or accessories used in media workflows.
Wireless connections such as Bluetooth and Wi-Fi are also vital; however, the focus here is on physical buttons and ports. Failure in button-driven toggles, like the mute switch or power button, can indirectly hamper wireless operation, highlighting the importance of hardware condition.
- Test each physical button for responsiveness and tactile feedback.
- Confirm volume buttons adjust sound levels without delay or hiccups.
- Verify the mute switch toggles silent mode instantly.
- Check the power/side button for screen wake/sleep functionality and accessibility feature activation.
- Test the Home button for accuracy and integrated fingerprint recognition.
- Inspect the charging port for debris, corrosion, or pin damage.
- Charge the device using an official or certified charger to ensure compatibility.
- Test data transfer speed and peripheral connectivity through the port.
- Check for physical damage or loosening of buttons and port connectors.
- Request repair history or replacement documentation if available.
| Component | Function | Assessment Method |
|---|---|---|
| Volume Buttons | Adjust audio levels during playback and calls | Manual press test for immediate audio response |
| Mute Switch | Toggle silent and ring modes quickly | Toggle switch and observe system response |
| Power/Side Button | Wake/sleep device and activate voice assistant | Press to lock/unlock screen and test voice assistant activation |
| Home Button with Touch ID | Home navigation and biometric authentication | Press responsiveness and fingerprint recognition functionality |
| Charging/Data Port (Lightning/USB-C) | Charge device and connect to peripherals | Visual inspection and test with charger and data cables |
Step-by-Step Guide to Test iPhone Buttons and Connections
- Visually inspect all buttons and connection ports for physical damage or debris.
- Press each button multiple times to assess consistency in tactile feedback.
- Use volume buttons during media playback to ensure immediate response.
- Toggle mute switch to verify silent mode activation.
- Press power button to lock and unlock the screen and test voice assistant accessibility.
- If applicable, test the Home button’s responsiveness and Touch ID recognition.
- Check the charging port for cleanliness; remove lint with a plastic toothpick cautiously if necessary.
- Plug in the charger and observe charging status and stability.
- Connect the iPhone to a computer or compatible peripheral and test data transfer.
- Ask the seller about any past repairs or replacements of buttons and ports.
TOP 10 Recommended iPhones in Brazil with Reliable Buttons and Connections
- iPhone 14 Pro Max – Approx. R$8,000 – Robust build with durable buttons and fast USB-C connectivity.
- iPhone 13 Pro – Approx. R$6,500 – Excellent physical controls and Lightning port reliability.
- iPhone 12 – Approx. R$4,800 – Solid button performance with stable charging port.
- iPhone 11 Pro – Approx. R$4,500 – Responsive buttons, well-maintained port design.
- iPhone SE 2022 (3rd Gen) – Approx. R$3,200 – Compact with responsive physical buttons.
- iPhone XR – Approx. R$3,000 – Reliable buttons but Lightning port shows wear on older units.
- iPhone XS – Approx. R$3,300 – Durable buttons with consistent charging port operation.
- iPhone 14 – Approx. R$6,000 – Good hardware with headphone jack replaced by wireless focus.
- iPhone 8 Plus – Approx. R$2,800 – Classic design with physical Home button and solid port longevity.
- iPhone 7 – Approx. R$2,500 – No headphone jack but buttons and ports remain reliable for daily use.
Ensuring that all buttons and connection ports work flawlessly on a seminovo iPhone guarantees smooth hardware interaction and prevents interruptions. This is especially important for technical professionals who depend on precise device control and peripheral connectivity in demanding workflows.
Áudio: Alto-Falantes e Microfones em Ponto
For professionals in areas such as video editing, music production, live streaming, software development, and 3D design, evaluating the audio components of a seminovo iPhone—specifically the speakers and microphones—is fundamental. The quality and reliability of these parts directly affect multimedia creation, sound capture, communication clarity, and overall device usability.
The iPhone’s audio system includes several speakers designed for stereo playback and multiple microphones strategically placed to capture clear sound while minimizing background noise. Any degradation in these components can compromise audio fidelity, disrupt recording sessions, and hinder voice communication, making thorough testing indispensable.
Testing Loudspeakers
Start with playing audio content across a wide frequency spectrum, such as music tracks with bass, mids, and highs. A healthy speaker setup should reproduce sound crisply at both low and high volumes without distortion, crackling, or buzzing noises. Professionals handling audio mixing or video editing often rely on accurate monitoring to make precise adjustments, so the speaker’s clarity matters immensely.
Check each speaker component (bottom, front earpiece, and rear if applicable) individually when possible. Many iPhones have stereo speaker systems with sound played through both the bottom loudspeaker and the earpiece to create an immersive experience. Verify that both sides emit balanced sound to avoid inaccuracy during audio reviews or work presentations.
Evaluating Microphones
The microphones are essential for voice recording, video soundtracks, and calls. They include the primary mic located at the bottom, a front microphone near the front camera for noise cancellation and calls, and additional mics for stereo recording and directional audio capture.
Test microphones by recording audio notes or videos in different environments. The captured audio should be clear, natural, and free of static or interference. Also, evaluate active noise reduction features by speaking in noisy surroundings and listening to playback quality. Poor mic performance can derail streaming sessions, voice-controlled interactions, and on-site content recording.
- Play varied audio content and listen to the speakers at multiple volume levels for distortion.
- Test the bottom speaker and earpiece speaker for balanced stereo output.
- Record voice memos in quiet and noisy environments to check mic sensitivity and clarity.
- Make a phone call or use VoIP apps to evaluate audio transmission quality.
- Use third-party apps that allow separate testing of microphone channels.
- Inspect speaker grills and microphone openings for dust, dirt, or blockage.
- Check for crackling, muted sounds, or hissing noises during playback or recording.
- Compare audio recordings with a reference device to detect significant quality drops.
- Ensure speaker and mic synchronization during video capture is accurate.
- Request any history of audio component repairs or replacements from the seller.
Comparison Table: Key Audio Components and Functions
| Component | Function | Testing Method |
|---|---|---|
| Loudspeaker (Bottom) | Main audio output for media and speakerphone | Play audio tracks; observe volume and clarity |
| Earpiece Speaker | Audio output during calls and stereo sound | Make a call; test stereo balance with music |
| Primary Microphone | Captures main audio for calls and recordings | Voice memo recordings; check clarity and noise |
| Secondary Microphones | Noise cancellation and directional audio capture | Test in noisy environments; record ambient sound |
Step-by-Step Guide to Test iPhone Audio Components
- Inspect speaker grills and microphone openings for physical obstructions or damage.
- Play a range of audio tracks and listen carefully for clarity, distortion, and volume consistency.
- Call a trusted contact and verify audio transmission clarity and speaker quality.
- Record voice memos in quiet and noisy environments for microphone sensitivity assessment.
- Test video recording syncing of audio and video streams.
- Use audio diagnostic apps for a detailed microphone channel test.
- Check speaker output balance by switching audio channels where applicable.
- Evaluate noise cancellation by recording with ambient noise and checking playback.
- Clean ports and grills gently if debris is present, then retest functionality.
- Discuss previous repairs or replacements with the seller to ensure component integrity.
Top 10 Recommended iPhone Models in Brazil for Audio Performance
- iPhone 14 Pro: Approx. R$7,500 – Advanced spatial audio and improved mic arrays.
- iPhone 13 Pro: Approx. R$6,500 – Excellent multi-mic design and clear speaker output.
- iPhone 12 Pro Max: Approx. R$5,800 – Strong stereo speakers and noise-canceling mics.
- iPhone 11 Pro: Approx. R$4,500 – Balanced speaker and microphone quality.
- iPhone SE (3rd Gen): Approx. R$3,200 – Compact device with solid audio components.
- iPhone XR: Approx. R$2,800 – Reliable speaker and mic for general use.
- iPhone 13: Approx. R$5,000 – Good speaker performance and mic array for audio professionals.
- iPhone 14: Approx. R$6,000 – Enhanced audio for streaming and video calls.
- iPhone 11: Approx. R$3,800 – Dependable and clear audio recording setup.
- iPhone X: Approx. R$3,500 – Still effective, but less advanced compared to newer models.
Ensuring speakers and microphones are in perfect condition maximizes both communication quality and multimedia content fidelity. For technical professionals, this means no compromises on audio clarity whether recording, streaming, or editing on your iPhone.
Conectividade: Wi-Fi, Bluetooth e Dados Móveis
For professionals in video editing, music production, software development, 3D design, and similar fields, the quality and reliability of connectivity features such as Wi-Fi, Bluetooth, and mobile data are essential. These technologies enable seamless communication, cloud access, media streaming, and peripheral device integration, which are fundamental for efficient workflows. Any instability or malfunction in connectivity can cause significant disruptions, delayed file transfers, or failure in synchronization across devices.
Wi-Fi connectivity allows users to connect to wireless networks for internet access and local resource sharing. For tech professionals, stable and fast Wi-Fi connections are necessary for uploading and downloading large multimedia files, collaborating online, and using cloud-based services. Therefore, testing Wi-Fi capabilities, including speed, reliability, and compatibility with various network standards, is a top priority when evaluating a seminovo iPhone.
Bluetooth technology connects the iPhone to external devices such as wireless headphones, audio interfaces, MIDI controllers, external storage, and input devices. Professionals depend on stable Bluetooth connections for live audio monitoring, wireless control, and peripheral integration. Testing range, pairing speed, and connection stability ensures that Bluetooth components meet the demands of modern creative work.
Mobile data connectivity ensures internet access on the go via cellular networks. For field professionals, musicians performing live, or developers testing mobile apps, reliable 4G or 5G access is critical. Verifying SIM card recognition, network locking status, data speeds, and handoff between network types can prevent unexpected connectivity issues.
Wi-Fi Connectivity Assessment
Evaluate Wi-Fi by connecting the iPhone to multiple types of networks—such as 2.4 GHz and 5 GHz bands—and test performance. Use speed test apps to measure download and upload speeds and check for signal strength consistency. Additionally, ensure the device is compatible with latest standards like Wi-Fi 6, especially in more recent iPhone models.
Check for network dropout occurrences and automatic reconnection behavior after leaving and re-entering Wi-Fi range. For professionals working remotely or depending on cloud synchronization, dropped connections can lead to data loss or project delays.
Bluetooth Connectivity Testing
Test Bluetooth by pairing the iPhone with various peripherals commonly used in professional environments, including wireless headphones, external microphones, and MIDI controllers. Validate pairing speed, sustained connection stability, and audio data integrity during streaming.
Test range by walking away gradually from the connected device and checking for signal interruptions. Also, verify the functionality of Bluetooth profiles supported by the device, such as A2DP for audio streaming and HID for input devices.
Mobile Data Network Checks
Insert an active SIM card and confirm network recognition along with carrier and plan compatibility. Test data speeds through speed testing apps and verify switchovers between cellular data modes—such as 4G to 3G—in fluctuating signal conditions.
Also, confirm the absence of carrier locks, which can restrict functionality if the iPhone is locked to a specific network. This is important for professionals who require flexibility when traveling or switching service providers.
- Connect to Wi-Fi networks on both 2.4 GHz and 5 GHz bands; verify stable connection.
- Run repeated speed tests to check upload and download consistency.
- Test Wi-Fi reconnection reliability after moving out and back into signal range.
- Pair with Bluetooth headphones or audio interfaces; verify connection speed and stability.
- Evaluate audio latency and quality during Bluetooth streaming.
- Test Bluetooth range and profile support with relevant devices.
- Insert multiple SIM cards to test carrier and network recognition.
- Execute mobile data speed tests in varying signal strengths.
- Check for any carrier lock restrictions on the device.
- Verify switching between cellular data modes (3G, 4G, 5G) and network handoffs.
| Connectivity Type | Importance | Testing Parameter |
|---|---|---|
| Wi-Fi (2.4 GHz & 5 GHz) | Internet access and cloud service usage | Connection speed, stability, standards supported (Wi-Fi 5/6) |
| Bluetooth | Wireless peripheral connection (headphones, audio devices) | Pairing time, connection stability, supported profiles |
| Mobile Data (3G/4G/5G) | Internet access on the go | Network recognition, data throughput, carrier lock status |
Step-by-Step Guide to Test Connectivity on a Seminovo iPhone
- Connect to a trusted Wi-Fi network on different frequency bands and check signal strength.
- Run speed tests consecutively to verify consistent network throughput.
- Disconnect and reconnect to Wi-Fi to confirm automatic stable reconnection.
- Pair the device with multiple Bluetooth peripherals like headphones and MIDI controllers.
- Test audio and data transfer quality using the paired Bluetooth devices.
- Check Bluetooth connection range by moving away from the peripheral gradually.
- Insert an active SIM card and verify carrier detection and network access.
- Test mobile data speeds and observe performance in different locations.
- Confirm absence of carrier locks by trying SIM cards from different providers.
- Switch between cellular network types and confirm seamless handoff.
Top 10 Recommended Seminovo iPhones in Brazil for Connectivity Features
- iPhone 14 Pro: Approx. R$7,500 – Supports Wi-Fi 6E, advanced 5G connectivity.
- iPhone 13 Pro: Approx. R$6,500 – Strong Wi-Fi 6 and 5G performance.
- iPhone 12: Approx. R$4,800 – Reliable Wi-Fi 6 and 5G compatibility.
- iPhone 11 Pro: Approx. R$4,500 – Good Wi-Fi and LTE support.
- iPhone SE (3rd Gen): Approx. R$3,200 – Compact with solid connectivity features.
- iPhone XR: Approx. R$2,800 – Basic but stable Wi-Fi and LTE.
- iPhone 13: Approx. R$5,000 – Balanced for most connectivity needs.
- iPhone 14: Approx. R$6,000 – Excellent wireless feature set.
- iPhone 11: Approx. R$3,800 – Stable Wi-Fi and LTE for daily use.
- iPhone X: Approx. R$3,500 – Decent 4G and Wi-Fi, but no 5G.
Ensuring stable and fast Wi-Fi, Bluetooth, and mobile data connectivity on a seminovo iPhone guarantees that professionals can maintain productive and collaborative workflows without interruption or lag, no matter where they are.
iCloud e Bloqueio de Ativação: O Ponto Mais Crítico!
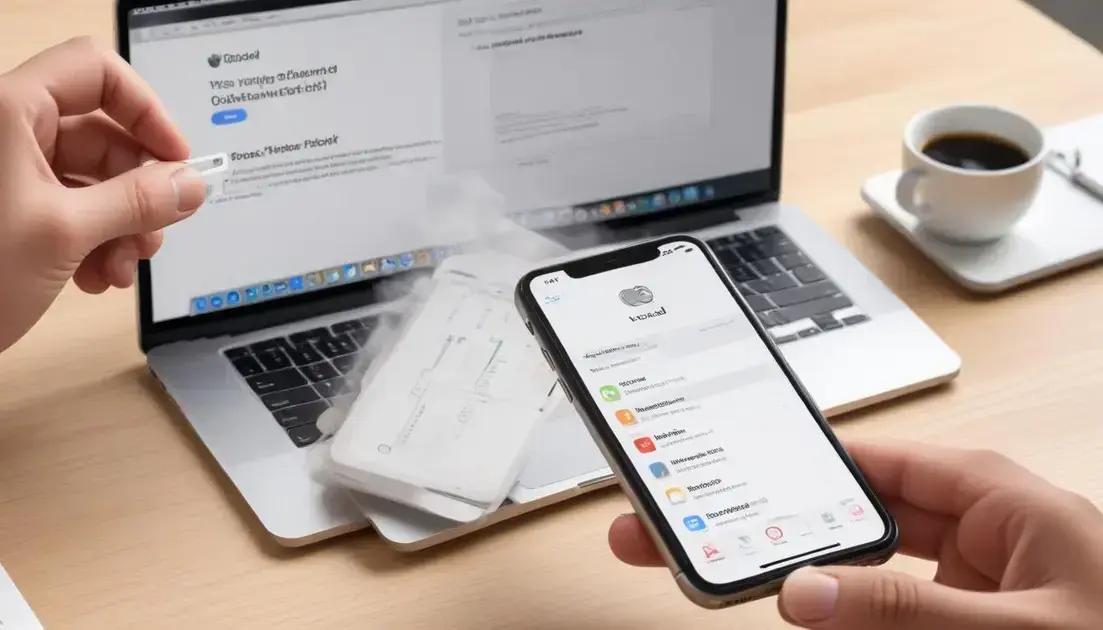
For tech professionals such as video editors, musicians, developers, and 3D artists, the security and accessibility of a seminovo iPhone hinge significantly on the status of iCloud and the Activation Lock. This feature, designed by Apple as a theft deterrent, can become the most critical factor to check before completing a purchase, as encountering a locked device can render the iPhone unusable and inaccessible.
Activation Lock is automatically enabled when the Find My iPhone feature is activated on the device. It links the iPhone to the original owner’s Apple ID, preventing anyone else from erasing or reactivating the device without the owner’s credentials. In the context of buying a seminovo iPhone, a locked device without the seller’s authorization is essentially bricked, meaning the buyer cannot fully use or reset the iPhone.
Professionals relying on uninterrupted device functionality cannot afford to purchase an iPhone that is blocked by Activation Lock. This security measure protects personal data but also acts as the biggest hurdle in the secondhand market. Therefore, verifying the device’s lock status is indispensable.
Understanding iCloud and Activation Lock
iCloud is Apple’s cloud storage and computing service, integrating data and device management. Activation Lock uses iCloud credentials to attach an Apple ID to the iPhone, preventing unauthorized access after theft or loss.
When Activation Lock is on, the device requires the Apple ID email and password originally associated with the iCloud account to deactivate the lock. Without this, even after restoring the device to factory settings, the iPhone remains locked.
This security mechanism enhances device security but complicates resale and transfer market transactions if proper care isn’t taken. Professional buyers must ensure this lock is disabled to maintain full device control.
Key Verification Steps Before Purchase
- Ask the seller to disable Find My iPhone and sign out of iCloud while in your presence.
- Request the device be reset and set up completely, confirming it does not ask for previous Apple ID credentials.
- Verify the device’s IMEI and serial number match the information provided by the seller.
- Use Apple’s support page to check warranty and activation status.
- Be wary of deals from unverified sellers with no proof of Apple ID removal.
- Ensure no iCloud lock notifications or verification prompts appear after device reset.
- Inspect iCloud settings to confirm no linked accounts remain.
- Confirm the absence of Activation Lock by navigating to Settings > General > Reset > Erase All Content and Settings and confirming no Apple ID prompt.
- Avoid paying or transferring funds fully before completing these checks.
- Incorporate escrow services or verified marketplace protections for added security.
Table: iCloud and Activation Lock Verification Checklist
| Verification Aspect | Action | Significance |
|---|---|---|
| Find My iPhone Status | Disabled by seller in your presence | Ensures Activation Lock removal |
| Device Reset | Full factory reset without Apple ID prompt | Confirms iCloud disconnection |
| Apple ID Logout | Seller signs out of iCloud account | Removes link to previous Apple ID |
| IMEI/Serial Verification | Match with seller’s documentation | Confirms device legitimacy |
| Activation Lock Check | Absence of lock prompt after reset | Confirms device is usable |
| Purchase Protections | Use escrow or verified marketplaces | Prevents fraud and loss |
| Clear Communication | Seller transparency on iCloud status | Reduces transaction risk |
| Proof of Ownership | Original receipts or invoices | Legitimizes the transaction |
| Device Lock History | Request repair or lock removal records | Validates device condition |
| Apple Support Tools | Warranty and lock status checks on Apple website | Independent verification |
Step-by-Step Guide to Avoid iCloud and Activation Lock Issues
- Request the seller to open the iPhone’s Settings and navigate to iCloud.
- Confirm that Find My iPhone is disabled.
- Ask the seller to sign out of iCloud completely on the device.
- Perform a factory reset with the seller present by going to Settings > General > Reset > Erase All Content and Settings.
- Ensure the device does not ask for the previous Apple ID’s password after reset.
- Verify the IMEI and serial number with the seller’s documentation and Apple’s support page.
- If purchasing online, use platforms that guarantee escrow and identity verification.
- Request proof of purchase to confirm legal ownership.
- Avoid purchasing devices that still show linked Apple IDs or Activation Lock screens.
- Consult Apple or authorized services if unsure about device lock status.
Top 10 Recommended Seminovo iPhones in Brazil Ensuring iCloud Flexibility
- iPhone 14 Pro: Approx. R$7,500 – Latest generation with robust security features and easy iCloud management.
- iPhone 13 Pro: Approx. R$6,500 – High performance and straightforward Activation Lock removal process.
- iPhone 12: Approx. R$4,800 – Balanced model with reliable iCloud control.
- iPhone 11 Pro: Approx. R$4,500 – Proven track record in iCloud handling.
- iPhone SE (3rd Gen): Approx. R$3,200 – Compact and straightforward for secondhand buyers.
- iPhone XR: Approx. R$2,800 – Popular model with manageable Activation Lock procedures.
- iPhone 13: Approx. R$5,000 – Seamless iCloud management, ideal for professionals.
- iPhone 14: Approx. R$6,000 – Full-featured device with updated security protocols.
- iPhone 11: Approx. R$3,800 – Solid choice with predictable iCloud handling.
- iPhone X: Approx. R$3,500 – Still relevant, but verify iCloud carefully.
Fully understanding and verifying iCloud and Activation Lock status before buying a seminovo iPhone avoids costly errors and ensures that your professional device remains fully accessible and secure.
Sensores e Funções Específicas: Face ID, Touch ID e Mais.
The advanced sensors and specific functions embedded in a seminovo iPhone are key features that highly technical users—such as video editors, musicians, developers, and 3D artists—need to carefully verify to ensure full device capability. Among these, Face ID and Touch ID stand out as primary biometric authentication methods, enhancing device security and user experience. Beyond biometrics, other sensors like accelerometers, gyroscopes, barometers, and proximity sensors play crucial roles in app functionality, augmented reality (AR), and hands-free interactions.
Face ID uses infrared technology combined with a TrueDepth camera system to create a detailed facial map for biometric authentication. This technology facilitates quick and secure unlocking, app authentication, and secure payments. For professionals engaged in creative workflows who value security and speed, a fully functional Face ID system enhances productivity by reducing friction in device access.
Touch ID, on the other hand, relies on a fingerprint sensor embedded in the Home button or power button in certain models. This method provides an alternative biometric authentication that is reliable and fast, especially for users who prefer tactile confirmation and face more varied lighting conditions where Face ID might struggle.
Testing Biometrics and Other Sensors
When evaluating a seminovo iPhone, ensure that Face ID recognizes your face under different lighting and angles without delays. Test the facial recognition speed and its ability to unlock the screen, authenticate apps like banking software, or approve Apple Pay transactions smoothly.
Touch ID should be equally tested by registering multiple fingerprints and verifying the sensor’s responsiveness and speed. The sensor must reject unauthorized fingerprints and work reliably in everyday scenarios.
Besides biometrics, verify other system sensors, including:
- Accelerometer: Measures device acceleration, crucial for camera stabilization and gaming responsiveness.
- Gyroscope: Detects orientation and rotation, vital for 3D modeling applications and AR experiences.
- Barometer: Measures atmospheric pressure, useful in fitness tracking and altitude detection.
- Proximity Sensor: Detects when the phone is near your face to disable the touchscreen during calls.
- Ambient Light Sensor: Adjusts display brightness according to environmental lighting to conserve battery and optimize visibility.
Malfunction in these sensors can degrade app accuracy and usability. For example, AR applications may fail to map environments correctly if the gyroscope or accelerometer is compromised.
Checklist to Evaluate Sensors and Functions
- Test Face ID with different facial positions and lighting conditions.
- Verify Touch ID recognition with multiple fingerprints and ensure rejection of unauthorized prints.
- Measure accelerometer responsiveness using apps that detect device movements.
- Check the gyroscope function by testing AR apps or specific utilities that rely on device orientation.
- Assess barometer accuracy with fitness or weather apps that rely on altitude measurement.
- Verify proximity sensor by making calls and observing screen behavior near the face.
- Test ambient light sensor by moving the phone through varying lighting conditions and watching brightness adjustments.
- Ensure all sensor-related features are updated with the latest iOS to optimize functionality.
- Check for any unusual sensor behavior or error messages in diagnostics.
- Consult the seller regarding repair or replacement history of sensors.
| Sensor/Function | Purpose | Test Method | Impact if Faulty |
|---|---|---|---|
| Face ID | Biometric facial authentication | Attempt unlocking and app authorizations under various conditions | Reduced security, inconvenience |
| Touch ID | Fingerprint-based authentication | Multiple fingerprint registrations and unlock tests | Access issues, security risk |
| Accelerometer | Motion detection | Use motion-sensitive apps like games or camera stabilization | Poor app performance |
| Gyroscope | Orientation sensing | AR apps and device rotation tests | AR and gaming disruption |
| Barometer | Altitude tracking | Fitness apps and weather altitude readings | Inaccurate activity tracking |
| Proximity Sensor | Screen on/off during calls | Call behavior tests | Touchscreen errors during calls |
| Ambient Light Sensor | Automatic brightness adjustment | Brightness changes in different lighting | Battery drain, poor screen visibility |
Step-by-Step Guide to Test iPhone Sensors and Functions
- Set up Face ID by following the setup process and test recognition in different lighting and angles.
- Register several fingerprints on Touch ID and verify unlocking speed and rejection sensitivity.
- Use motion-based apps to test accelerometer and gyroscope responsiveness.
- Open fitness or weather apps to check barometer data accuracy.
- Make phone calls to test the proximity sensor’s ability to deactivate the touchscreen.
- Move the device through varying light environments and observe ambient light sensor adjustments on screen brightness.
- Keep the device updated with the latest iOS for sensor compatibility and fixes.
- Review any available diagnostics for sensor errors.
- Discuss sensor condition and any repair history with the seller.
- Perform re-tests after restarting the device to confirm consistent sensor performance.
Top 10 Recommended Seminovo iPhones in Brazil for Sensor and Functionality Reliability
- iPhone 14 Pro: Approx. R$7,500 – Advanced Face ID, robust sensors for AR and motion.
- iPhone 13 Pro: Approx. R$6,500 – Reliable biometric and sensor suite.
- iPhone 12: Approx. R$4,800 – Solid balance performance, sensors fully operational.
- iPhone 11 Pro: Approx. R$4,500 – Trusted sensor performance with accurate biometric features.
- iPhone SE (3rd Gen): Approx. R$3,200 – Compact with efficient Touch ID sensor.
- iPhone XR: Approx. R$2,800 – Dependable sensors for most professional apps.
- iPhone 13: Approx. R$5,000 – Consistent sensor operation, suited for creatives.
- iPhone 14: Approx. R$6,000 – Comprehensive sensor suite for demanding users.
- iPhone 11: Approx. R$3,800 – Reliable for general sensor tasks.
- iPhone X: Approx. R$3,500 – Functional sensors, though older generation.
Verifying the functionality of sensors and specific features like Face ID and Touch ID is paramount for professionals who require a seamless and secure device experience. Properly functioning sensors enable sophisticated applications and ensure user safety and convenience.

