Você já percebeu como a qualidade da sua transmissão pode impactar diretamente na experiência do público? Se o áudio falha ou o vídeo aparece tremido, a atenção vai embora em segundos. É por isso que focar em melhorar qualidade live streaming torna qualquer criação mais profissional e atraente. Neste texto, vou mostrar técnicas e segredos para ajustar desde a câmera até o som, para que sua live alcance um nível superior de qualidade.
Vamos explorar juntos desde a escolha do equipamento ideal até os ajustes finos de iluminação e software. Com dicas práticas para montar seu setup em casa e garantir que o público fique conectado do começo ao fim. Fique comigo e descubra como dar um upgrade na sua transmissão sem complicações, transformando sua live em um verdadeiro espetáculo.
Câmera Ideal: Celular ou Webcam Profissional?
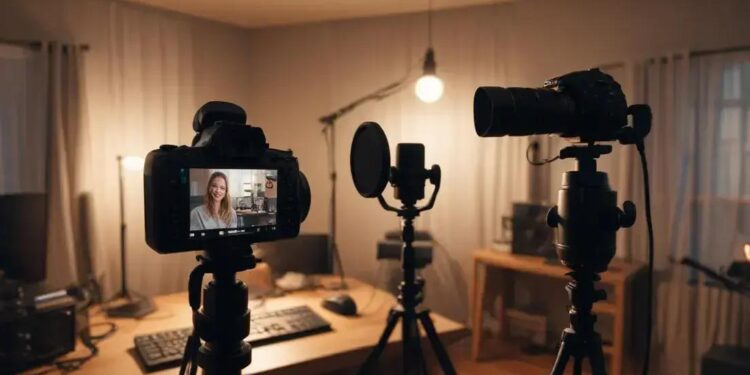
Choosing the right camera for live streaming is a crucial step toward delivering a crisp, professional-quality video that holds viewers’ attention. Whether you’re a video editor, musician, developer, or 3D artist, understanding the technical capabilities and limitations of your camera setup is key. The debate often stands between leveraging the convenience of a smartphone camera or investing in a dedicated professional webcam. Each option offers unique benefits and drawbacks that can impact your streaming quality and workflow.
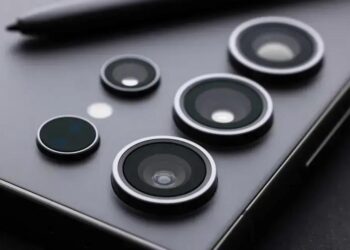
Modern smartphones come equipped with advanced camera systems capable of recording high-resolution video with excellent color accuracy and low-light performance. Brands routinely upgrade sensors, lenses, and processing chips to enable better video quality even in challenging conditions. Many flagship smartphones offer 4K video at 30 or 60 frames per second (fps), image stabilization, and robust autofocus systems. This makes them an accessible choice for streamers who prioritize mobility and ease of use, especially when paired with simple capture devices or software that can connect the phone directly to a PC.
However, professional webcams are purpose-built for continuous video capture and often include features tailored for streaming. These features may include higher-quality lenses with fixed focal lengths designed to minimize distortion, larger image sensors that perform better under artificial lighting, and integrated hardware encoders that reduce CPU usage during streaming. Many professional webcams also have superior microphones and support USB 3.0 or USB-C for faster data transfer. The convenience of plug-and-play functionality with most major streaming platforms gives webcams an edge for users seeking streamlined setups.
Technical Comparisons: Smartphone Cameras vs. Professional Webcams
| Aspect | Smartphone Camera | Professional Webcam |
|---|---|---|
| Resolution | Up to 4K UHD (3840×2160) at 30-60fps | Typically up to 1080p Full HD at 30-60fps; some models support 4K |
| Sensor Size | Small, but with advanced computational photography | Larger compared to webcams, better light sensitivity |
| Lens | Multi-lens systems with wide-angle and telephoto | Fixed focal length, often optimized for desk distance |
| Connectivity | Wireless (Wi-Fi/Bluetooth) or USB through capture cards | USB 3.0/USB-C direct connection |
| Software Integration | With additional apps or capture software | Native support in most streaming platforms and drivers |
| Portability | Highly portable | Less portable, meant for stationary setups |
| Price | Included in smartphone cost | Ranges from affordable (~R$300) to professional (~R$3,000+) |
These technical differences influence the choice. If maximum video resolution and portability are necessary, smartphones may present the best option with additional equipment like capture cards. Meanwhile, webcams offer convenience, consistent video quality, and better integration for fixed setups common among professionals.
Top 10 Recommended Cameras for Brazilian Streamers in 2024
- Logitech C920 HD Pro Webcam – Approx. R$700. Reliable 1080p webcam with solid low-light response, widely valued by streamers.
- Sony Xperia 1 IV (Smartphone) – Approx. R$6,500. Offers excellent 4K video and dedicated cinema-grade lenses with manual controls.
- Razer Kiyo Pro Webcam – Approx. R$1,600. Features adaptive light sensor for superior image quality in various environments.
- Elgato Cam Link 4K (Capture Device for Smartphones) – Approx. R$1,100. Converts smartphone video output into webcam input with minimal latency.
- Microsoft LifeCam HD-3000 – Approx. R$300. Budget-friendly webcam with 720p quality, suitable for beginners.
- GoPro HERO11 Black (Action Camera) – Approx. R$3,500. While not a webcam, with capture cards it offers ultra-wide 4K streaming flexibility.
- Apple iPhone 14 Pro (Smartphone) – Approx. R$7,000. Exceptional video quality with ProRes format for professional streaming setups.
- Logitech Brio Ultra HD Webcam – Approx. R$1,500. Supports 4K video and HDR, great for high-end streaming.
- Canon EOS Webcam Utility with DSLR Cameras – Starting from R$3,000 for DSLR. Provides superior optical performance for studio-level streams.
- Creative Live! Cam Sync 1080p V2 – Approx. R$400. Basic but decent 1080p webcam option with autofocus.
Practical Tips for Optimizing Your Camera Setup
- Use a tripod or a stable mount to prevent shaky footage.
- Ensure your camera lens is clean to avoid smudges or blurry images.
- When using a smartphone, enable airplane mode to prevent interruptions.
- Optimize lighting to reduce noise and enhance video clarity.
- Regularly check focus and exposure settings before going live.
- Use manual camera controls when possible to fine-tune image output.
- Test your camera setup on different streaming platforms for compatibility.
- Consider investing in a capture card to improve smartphone camera usability.
- Keep cabling organized and accessible for hassle-free setup.
- Update camera drivers and firmware to access latest features and fixes.
Step-by-Step: Setting Up a Smartphone for Live Streaming
- Choose a smartphone with good camera specs (preferably with 4K video).
- Download reliable camera apps that allow manual control of exposure and focus.
- Connect your smartphone to your PC using a capture card like Elgato Cam Link 4K.
- Mount the phone securely on a tripod at eye level.
- Position lighting to illuminate your face evenly, avoiding shadows.
- Configure your streaming software to recognize the capture device as the video source.
- Test the video feed and adjust camera settings until the quality is optimal.
- Ensure stable internet connection for uninterrupted streaming.
- Start streaming and monitor the video quality periodically.
- After streaming, review footage to assess potential improvements.
Áudio Impecável: Microfones que Transformam Sua Voz
In the realm of live streaming and digital content creation, audio quality is often just as important, if not more so, than video quality. An impeccable audio setup ensures that your audience hears every word, note, or sound effect clearly, creating a professional and engaging viewing experience. For video editors, musicians, developers, and other tech-savvy creators, understanding the characteristics and technical specifications of microphones can decisively transform the way your voice and other audio elements are captured and delivered.
Microphones convert sound waves into electrical signals, but their performance varies widely based on design, sensitivity, frequency response, and connectivity options. Selecting the right type of microphone tailored to your environment and streaming needs is essential. Factors like ambient noise, room acoustics, and intended usage (vocal streaming, instrument capture, podcasting) all influence your choice. From dynamic mics ideal in noisy settings to high-fidelity condenser microphones for studio clarity, the options cover a broad spectrum.
Understanding Microphone Types and Their Use Cases
Dynamic microphones are known for their durability and ability to handle high sound pressure levels (SPL), making them perfect for live environments or untreated rooms. They tend to reject background noise better but might sacrifice some detail relative to condenser mics.
Condenser microphones use a charged diaphragm to capture subtle nuances and a wider frequency response, offering rich, detailed audio. They usually require phantom power and are best suited for controlled studio environments.
Lavalier microphones or lapel mics provide hands-free convenience and are often used in interviews or presentations, though their smaller size can limit sound quality compared to larger models.
USB microphones offer plug-and-play simplicity and are popular among beginners and prosumers for streaming setups, though some high-end XLR mics provide superior audio fidelity when paired with quality audio interfaces.
| Microphone Type | Best Use | Strengths | Drawbacks |
|---|---|---|---|
| Dynamic | Live streaming, noisy rooms | Durable, rejects background noise | Less sensitive, narrower frequency response |
| Condenser | Studio recording, vocals, instruments | High sensitivity, detailed sound | Requires phantom power, sensitive to noise |
| Lavalier | Interviews, presentations | Hands-free, discrete | Limited fidelity, background noise pickup |
| USB | Content creation, streaming | Easy setup, affordable | Often lower quality than XLR |
Top 10 Microphones Recommended for Brazilian Creators in 2024
- Shure SM7B – Approx. R$4,000. Industry standard for broadcast vocals, dynamic mic with excellent noise rejection.
- Audio-Technica AT2020 – Approx. R$800. Affordable condenser microphone with crisp and clear audio capture.
- Blue Yeti USB – Approx. R$1,000. Versatile USB mic with multiple polar patterns for streaming and podcasting.
- Rode NT1-A – Approx. R$1,500. Low noise condenser mic perfect for studio vocals and instruments.
- Sennheiser e935 – Approx. R$1,200. Dynamic mic favored for vocals in noisy environments.
- HyperX QuadCast – Approx. R$1,200. USB mic with built-in shock mount and RGB lighting for gamers.
- Samson Q2U – Approx. R$600. Hybrid USB/XLR mic suitable for beginners seeking flexibility.
- AKG P220 – Approx. R$1,100. Condenser mic delivering detailed recordings for musicians and streamers.
- Rode Wireless GO II – Approx. R$2,000. Compact wireless lavalier system with excellent range and sound quality.
- Behringer C-1 – Approx. R$500. Budget condenser mic good for starters, offers surprising clarity.
Key Factors to Optimize Your Microphone Setup
- Place the microphone between 6 to 12 inches from your mouth for optimal clarity and warmth.
- Use a pop filter or foam windscreen to reduce plosive sounds like “p” and “b”.
- Employ a shock mount to minimize vibrations and handling noise.
- Choose an appropriate polar pattern (cardioid is common) to focus on your voice and block ambient noise.
- Consider acoustic treatment in your room to minimize echoes and reverberations.
- Adjust gain and volume levels carefully to prevent distortion or background hiss.
- If using XLR microphones, invest in a quality audio interface or preamp for better signal conversion.
- Regularly clean your microphone diaphragm and hardware to maintain performance.
- Test different mic placements to find the sweet spot for your voice.
- Monitor your audio in real-time with headphones to catch issues immediately.
Step-by-Step Guide to Set Up a Professional Streaming Microphone
- Select the right microphone type based on your environment and use case.
- Connect your microphone to the computer: USB mics plug in directly; XLR mics require an audio interface.
- Mount the microphone securely on a boom arm or stand to reduce handling noise.
- Attach necessary accessories like pop filters and shock mounts.
- Configure audio settings in your streaming software or digital audio workstation.
- Perform a sound check to adjust gain, volume, and equalization settings.
- Position yourself correctly to maintain consistent audio levels during streaming.
- Use headphones to monitor the sound and catch unwanted noise.
- Record a test clip and evaluate the audio quality on multiple devices.
- Make iterative adjustments based on feedback and environmental changes.
Iluminação Perfeita: Destaque-se na Tela
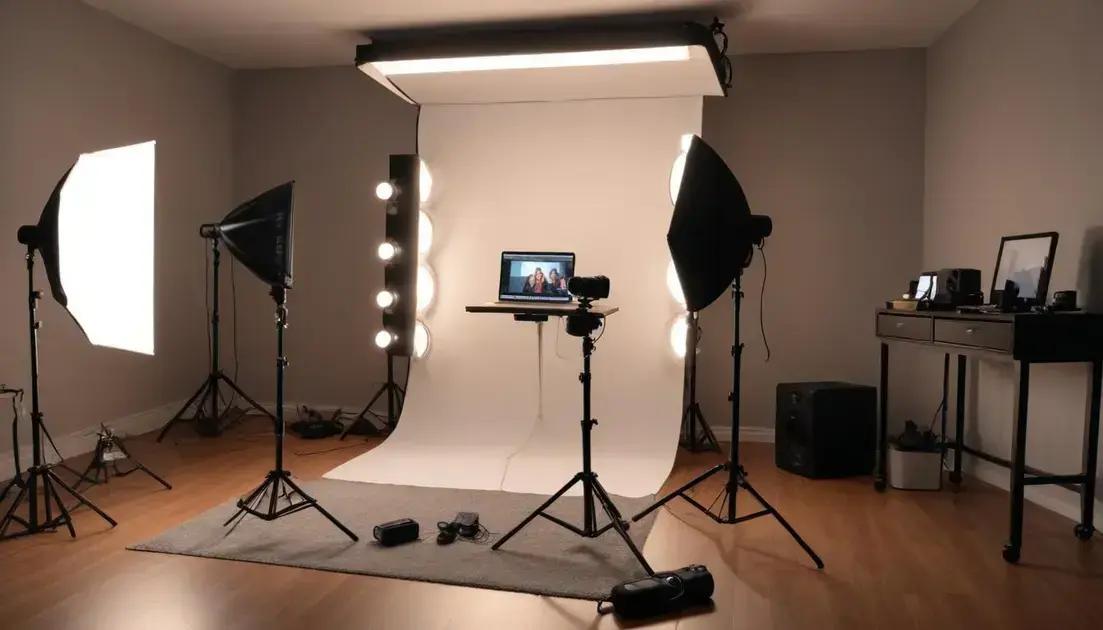
Lighting plays a pivotal role in producing professional-grade live streams, video projects, and broadcasts. For content creators such as video editors, musicians, developers, and 3D artists, perfect lighting enhances the clarity and visual appeal of the subject, ensuring that every detail is vividly captured. Poor lighting can create shadows, noise, and uneven color tones that distract viewers and degrade the overall quality of the stream or recording.
Effective lighting helps to separate the subject from the background, highlight facial features, and reduce unwanted reflections or harsh shadows. Understanding the key principles of lighting design—intensity, direction, color temperature, and diffusion—is essential. By mastering these basics, creators can shape their space to maximize aesthetic impact and technical precision.
Fundamentals of Proper Lighting for Streaming and Recording
Light intensity affects how bright your subject appears on camera. Overexposure results in washed-out visuals, while underexposure hides details in darkness. Using dimmable lighting fixtures can provide greater control over brightness levels to adapt to different times of day or ambient light conditions.
Directionality is crucial; front lighting illuminates the face evenly, while side or back lighting adds depth and contour, creating a three-dimensional effect. Avoid harsh overhead lighting, which tends to cast unflattering shadows, particularly around the eyes and chin.
Color temperature, measured in Kelvins (K), determines the warmth or coolness of light. Daylight typically sits around 5600K, producing crisp, bluish light, while tungsten or indoor lighting registers closer to 3200K, emitting warmer, yellow-orange tones. Consistent color temperature across light sources prevents color imbalance in video recordings.
Diffusion softens light by dispersing it, reducing shadows and glare. Softboxes, LED panels with diffusers, or umbrellas help create flattering and natural-looking illumination by minimizing harsh contrasts.
Key Lighting Techniques and Equipment
- Three-Point Lighting: Key light (main source), fill light (to soften shadows), and backlight (to separate the subject from background).
- Ring lights: Circular LED lights that provide uniform illumination and pleasing catchlights in the eyes.
- Softboxes: Large diffusers that create soft, even light, perfect for studio environments.
- LED panels: Versatile, low-heat lights with adjustable brightness and color temperature.
- Reflectors: Surfaces that bounce light to fill shadowed areas without adding additional lamps.
- Light stands and mounts: Secure and adjustable supports for positioning lights at various angles.
- Color gels: Colored filters to change light hue creatively or correct color temperature mismatches.
- Smart controls: Apps or DMX controllers to automate and fine-tune lighting setups remotely.
- Ambient lighting: Using natural or room lights strategically to complement artificial light sources.
- Light modifiers: Barn doors, grids, and snoots to shape and direct light precisely.
Comparison of Popular Lighting Equipment Used by Professionals
| Lighting Type | Brightness (Lumens) | Color Temperature (K) | Portability | Estimated Price (BRL) |
|---|---|---|---|---|
| Neewer Ring Light 18″ | 1600 | 3200 – 5600 Adjustable | High | R$550 – R$700 |
| Godox LEDP260C LED Panel | 2800 | 3300 – 5600 Adjustable | Medium | R$900 – R$1,200 |
| Fancierstudio Softbox Kit | 1500 per softbox | Daylight (5600K) | Low | R$1,200 – R$1,600 (kit) |
| Elgato Key Light | 2500 | 2900 – 7000 Adjustable | High | R$1,500 – R$1,800 |
Practical Tips to Achieve Perfect Lighting on Screen
- Use a three-point lighting setup to create depth and eliminate shadows effectively.
- Position your key light at a 45-degree angle from your face for flattering illumination.
- Utilize fill lights at lower intensity to soften harsh shadows caused by the key light.
- Place a backlight behind you to separate your figure from the background, adding dimension.
- Adjust color temperature to match your environment and avoid unnatural skin tones.
- Diffuse your light sources using softboxes or umbrellas to reduce glare and reflections.
- Minimize mixed lighting from windows or room lights that differ in color temperature.
- Experiment with light placement and intensity before the live stream for optimal settings.
- Use reflectors to bounce light gently onto shadowed areas without extra lamps.
- Maintain consistent lighting throughout your session to avoid visible changes on camera.
Step-by-Step Guide: Setting Up Lighting for Live Streaming
- Select your primary key light, preferably an LED panel or ring light with adjustable brightness and color temperature.
- Mount your key light on a stand and position it approximately 45 degrees to one side of your face and slightly above eye level.
- Set up a fill light on the opposite side at a lower intensity to soften shadows produced by the key light.
- Install a backlight behind you, pointed at your shoulders or the back of your head, to create separation from the background.
- Test the lighting by recording or previewing on your streaming software, adjusting brightness and angles as needed.
- Use diffusers or softboxes over lights if shadows are too harsh or highlights too bright.
- Turn off or minimize other room lights that create mixed color temperature for consistent results.
- Position reflectors to bounce light and fill any dark areas on your face or workspace.
- Calibrate the white balance setting on your camera or software to match the color temperature of your lights.
- Monitor your lighting throughout your stream and make adjustments if environment lighting changes.
Setup de Transmissão: Monte Seu Estúdio em Casa
Montar um setup de transmissão eficiente em casa vai muito além de apenas ligar uma câmera e microfone ao computador. Para profissionais como editores de vídeo, músicos, desenvolvedores, artistas 3D e analistas, a qualidade do seu estúdio caseiro pode impactar dramaticamente a produção, o engajamento do público e a credibilidade do seu conteúdo.
Um setup bem planejado une tecnologia adequada, organização do espaço e um fluxo de trabalho otimizado. Não importa se você está focado em streaming ao vivo, gravação de vídeos ou podcasts, cada componente precisa ser analisado para garantir funcionalidade, conforto e qualidade técnica.
Componentes essenciais para seu estúdio de transmissão
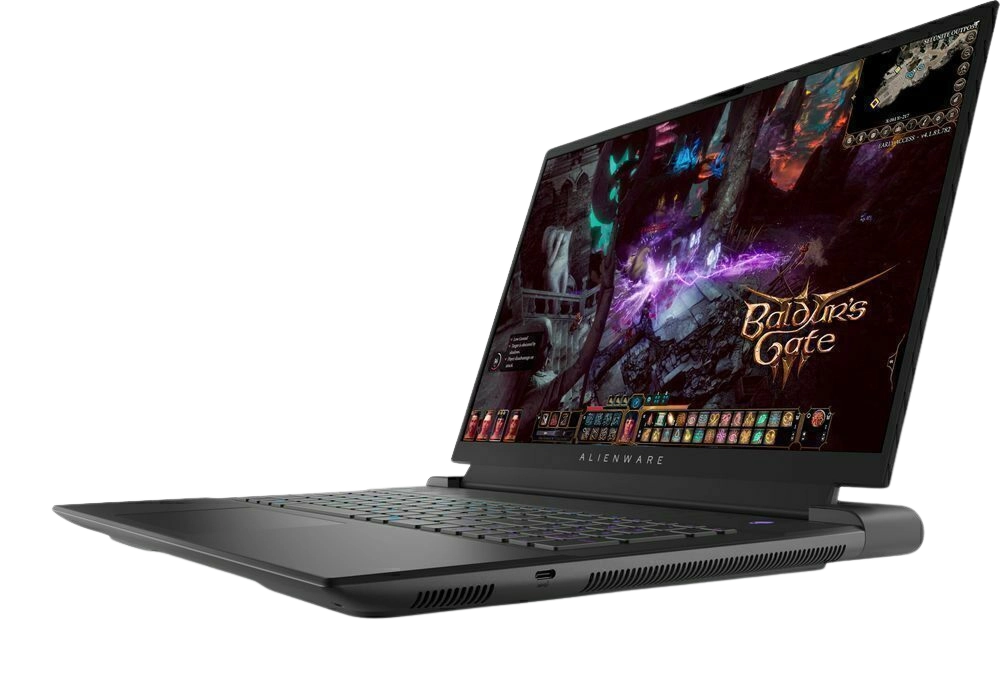
Hardware: O computador é o coração da operação. Recomendamos CPUs robustas, como processadores Intel Core i7 ou AMD Ryzen 7, que oferecem desempenho necessário para edição multitarefa e codificação em tempo real. Memória RAM de pelo menos 16GB assegura fluidez durante transmissões e renderização. Placas de vídeo dedicadas, como as GPUs Nvidia RTX ou AMD Radeon, também ajudam na aceleração de tarefas gráficas, especialmente para criadores 3D e editores de vídeo.
Áudio e vídeo: Além da câmera e microfone, o uso de interfaces de áudio (conversores de sinal analógico para digital) melhora significativamente a qualidade sonora. Monitores de áudio de qualidade permitem mixagens precisas. Em termos de vídeo, webcams Full HD ou câmeras DSLR/mirrorless conectadas via captura de vídeo possibilitam imagens nítidas e controles manuais avançados.
Ambiente: Um espaço organizado e insonorizado ajuda a reduzir ruídos externos e eco indesejado. Painéis acústicos, cortinas pesadas e tapetes são aliados para melhorar a acústica. Também é importante controlar a iluminação para evitar sombras e pontos de luz desconfortáveis.
Organização e fluxo de trabalho eficiente
O cabeamento deve ser planejado para evitar confusão. Use canaletas, etiquetas e ao máximo evite fios expostos para manter o espaço limpo. Manter drivers e softwares atualizados ajuda a evitar travamentos e incompatibilidades. Softwares de streaming, como OBS Studio, Streamlabs, e XSplit, oferecem recursos para personalização do layout, inserção de gráficos, e controle de áudio, sendo essenciais para criar uma transmissão profissional.
- Priorize equipamentos compatíveis entre si para facilitar integração.
- Invista em um bom monitor secundário para acompanhamento de chats e alertas.
- Adicione um mixer de áudio para controle dinâmico de múltiplas fontes sonoras.
- Configure backups de energia para evitar interrupções repentinas.
- Use cadeiras ergonômicas para conforto em longas sessões de streaming.
- Configure shortcuts e automatizações nos softwares para agilizar comandos frequentes.
- Teste todo o setup com antecedência para calibragem de equipamentos.
- Inclua elementos visuais e sonoros personalizados para fortalecer sua identidade.
- Mantenha o ambiente limpo para minimizar interferências físicas e visuais.
- Considere investir em um segundo PC dedicado à codificação e transmissão para setups avançados.
TOP 10 Produtos para Montar um Estúdio de Transmissão em Casa no Brasil
- PC Gamer Corsair Vengeance i7-12700K + RTX 3060 Ti – R$14.000; excelente para edição, streaming e tarefas pesadas.
- Microfone Shure SM7B – R$4.000; microfone dinâmico robusto e muito usado para transmissão profissional.
- Câmera Sony Alpha a6100 Mirrorless – R$4.500; oferece gravação em 4K e qualidade superior em baixa luz.
- Interface de áudio Focusrite Scarlett 2i2 (3ª Geração) – R$1.000; conversor de alta qualidade, ideal para gravações e streaming.
- Monitor LG 27UL650-W 4K – R$2.500; excelente fidelidade de cores e resolução para edição e visualização detalhada.
- Placa de captura Elgato HD60 S+ – R$1.500; captura vídeo em alta definição com baixa latência.
- Teclado Mecânico HyperX Alloy FPS Pro – R$600; resistente e com resposta rápida, ideal para produtores e gamers.
- Cadeira Gamer DXRacer – R$2.000; ergonomia e conforto para longas horas na frente do computador.
- Iluminação Elgato Key Light Air – R$1.000; iluminação ajustável que valoriza a imagem com iluminação uniforme.
- Headset Audio-Technica ATH-M50X – R$900; fones de ouvido precisos para monitoramento de áudio profissional.
Passo a passo para montar seu estúdio de transmissão
- Escolha o local ideal, preferencialmente um ambiente silencioso e com controle de luz natural.
- Invista em equipamentos conforme seu orçamento e necessidades específicas.
- Organize o espaço físico, instalando mesas e suportes para os equipamentos.
- Configure o computador, instalando todos os drivers e softwares necessários.
- Configure e teste sua câmera e microfone, ajustando posições e níveis.
- Instale painéis acústicos e crie um sistema de iluminação eficaz para evitar sombras.
- Planeje o cabeamento, usando canaletas e etiquetas para organização.
- Customiza o software de streaming para incorporarem elementos visuais e alertas.
- Realize testes de transmissão para identificar e corrigir possíveis falhas.
- Mantenha a rotina de manutenção dos equipamentos e atualização de softwares.
Software Essencial: Ferramentas para Gerenciar Sua Live
Gerenciar uma transmissão ao vivo eficiente envolve o uso correto de ferramentas de software que otimizam desde a captura de áudio e vídeo até a interação com o público. Para profissionais técnicos como editores de vídeo, músicos, desenvolvedores e artistas 3D, escolher softwares essenciais pode transformar completamente a qualidade e fluidez da live, além de facilitar o workflow e reduzir problemas durante o streaming.
O software de transmissão atua como o ponto central onde fontes de vídeo, áudio, gráficos e chat são integrados e enviados para a plataforma de streaming escolhida. Esses programas oferecem funcionalidades que vão desde a simples captura da webcam até configurações avançadas de multi-câmeras, sobreposição de layouts gráficos, controle de áudio e gerenciamento de alertas.
Principais tipos de software para transmissão ao vivo
Softwares de codificação e transmissão são essenciais para enviar o conteúdo ao vivo para plataformas como YouTube, Twitch e Facebook. Programas como OBS Studio (Open Broadcaster Software) e Streamlabs OBS são versões populares e gratuitas que suportam personalizações poderosas e extensibilidade via plugins.
Plataformas de interação com a audiência adicionam recursos como alertas personalizados, integração com chat, gerenciamento de doações e moderação, além de painéis analíticos para acompanhamento da audiência em tempo real.
Softwares de mixagem e gerenciamento de áudio auxiliam no equilíbrio do som capturado, eliminando ruídos, eco e controlando níveis automáticos. Ferramentas como Voicemeeter e Adobe Audition são amplamente usadas por streamers para polir o áudio de maneira técnica.
Sistemas de automação e produção permitem alternar entre cenas, inserir vídeos pré-gravados, criar efeitos visuais dinâmicos e controlar remotamente diversos aspectos do streaming, aumentando a qualidade e complexidade técnica das transmissões.
Comparativo de Softwares de Transmissão Mais Utilizados
| Software | Plataformas Suportadas | Recursos Principais | Preço | Nota para Profissionais |
|---|---|---|---|---|
| OBS Studio | Twitch, YouTube, Facebook, entre outras | Open source, multi-câmera, plugins, gravação local | Gratuito | 9/10 |
| Streamlabs OBS | Twitch, YouTube, Facebook | Interface intuitiva, alertas integrados, layout customizável | Gratuito / Premium com recursos extras | 8.5/10 |
| XSplit Broadcaster | Twitch, YouTube, Facebook | Fácil configuração, suporte a múltiplas câmeras, plugins | Assinatura a partir de R$55/mês | 8/10 |
| vMix | Twitch, YouTube, Facebook, Zoom | Mixagem de vídeo avançada, suporte 4K, replay instantâneo | Licença a partir de R$2.000 (versão básica) | 9.5/10 |
| Voicemeeter | Windows (interface de áudio) | Mixagem virtual de áudio, controle de múltiplas fontes | Gratuito / Donativo | 9/10 |
Dicas Práticas para Maximizar a Eficiência do Software na Sua Live
- Antes da transmissão, configure todas as fontes de vídeo e áudio no software para evitar falhas técnicas.
- Use cenas pré-configuradas para alternar rapidamente entre diferentes layouts durante a live.
- Integre plugins para alertas customizados que melhorem a interação com o público.
- Monitore a utilização do CPU e memória para evitar travamentos e quedas de frame.
- Configure atalhos de teclado para controlar comandos essenciais sem sair da tela principal.
- Utilize filtros de áudio para eliminar ruídos de fundo e melhorar a clareza da voz.
- Realize testes frequentes com gravações locais para analisar qualidade antes de ir ao vivo.
- Garanta que os drivers de hardware estejam sempre atualizados para compatibilidade máxima.
- Configure múltiplos monitores ou janelas para acompanhar chat, alertas e estatísticas em tempo real.
- Considere utilizar softwares de automação para facilitar operações durante pausas ou transições complexas.
Passo a Passo para Configuração Básica com OBS Studio
- Baixe e instale a versão mais recente do OBS Studio no site oficial.
- Abra o software e crie um novo perfil para a sua live.
- Configure as fontes de vídeo, adicionando webcam ou captura externa.
- Configure as fontes de áudio, selecionando microfone principal e sons do sistema.
- Monte suas cenas, criando diferentes layouts para variações durante a transmissão.
- Teste a transmissão local, verificando áudio, vídeo e sincronização.
- Configure a integração com a plataforma de streaming desejada, inserindo chave de stream.
- Configure alertas e widgets (opcional) para interatividade.
- Faça um teste final com transmissão privada para monitorar desempenho.
- Inicie sua live e monitore recursos e feedbacks durante a transmissão.

It appears that the provided subheading is ‘[object Object]’, which is not a valid title to generate content for. Please provide a specific subheading or topic so that I can create detailed, technical, and comprehensive content tailored for video editors, musicians, developers, 3D artists, and other technical professionals.
Once you provide the correct subheading, I will be able to deliver content with expert depth, clear explanations, structured with HTML for readability, and including relevant tips, product recommendations, tables, and step-by-step guidance as requested.

