Já pensou em comprar um iPhone seminovo e temer acabar com uma dor de cabeça? O Checklist iPhone Seminovo é o seu melhor aliado para evitar surpresas desagradáveis e garantir um investimento seguro. Antes de fechar negócio, saber exatamente o que verificar faz toda a diferença. Você vai aprender quais aspectos realmente importam na hora da compra, desde a origem do aparelho até o funcionamento detalhado de cada componente.
Neste artigo, desvendo os principais passos para você avaliar a procedência, o estado da bateria, a qualidade da tela e câmeras, além dos recursos de segurança como o bloqueio de ativação. Se você está curioso para conhecer como identificar um iPhone seminovo em boas condições, siga a leitura e fique mais confiante para fechar o melhor negócio, sem riscos ou arrependimentos.
Verificação da Procedência: A Segurança em Primeiro Lugar
When considering the purchase of a used iPhone, Verificação da Procedência is the crucial first step to ensure a secure and trustworthy investment. This verification means confirming the device’s origin, ownership history, and legal status before proceeding with any transaction. For professionals like video editors, musicians, or developers, who rely heavily on device performance and reliability, overlooking this stage could result in significant losses—both financial and in productivity.
The provenance of a second-hand iPhone directly impacts its value and usability. Devices purchased from unauthorized sellers may carry risks such as being stolen, blocked due to unpaid bills, or having authentic parts replaced with substandard components. Therefore, meticulous investigation measures are necessary to prevent legal complications and guarantee the iPhone’s full functionality.
Key Elements to Check During Device Origin Verification
One of the first technical checks involves obtaining the iPhone’s unique identifiers: the serial number and IMEI (International Mobile Equipment Identity). These identifiers enable buyers to verify device legitimacy via Apple’s official system and third-party databases. They can reveal if the iPhone is blacklisted, locked in the iCloud account of the previous owner, or reported stolen.
Furthermore, it is vital to review physical documentation provided by the seller—proof of purchase, warranty status, and any repair history. A well-documented history corroborates the trustworthiness of the device and clarifies if it has undergone previous replacements or refurbishments, which can influence its lifespan and performance.
For developers and creative professionals, subtle differences in device firmware or unauthorized alterations can cause incompatibility with crucial software tools or unexpected shutdowns under heavy workloads. Hence, confirmation of the device’s authenticity through official platforms is indispensable.
Practical Checklist for Verificação da Procedência
- Request the iPhone’s serial number and IMEI from the seller.
- Use Apple’s official website or trusted third-party services to check device activation status and warranty coverage.
- Verify if the iPhone is reported as lost, stolen, or blacklisted through databases like CTIP (Central de Teste de IMEI no Brasil).
- Confirm that the device is not linked to any iCloud account by requesting proof of iCloud logout or device reset.
- Ask for original purchase receipts and any repair history documentation.
- Inspect the device’s physical condition for signs of tampering or unauthorized repairs.
- Check whether the seller is a reputable source or authorized reseller.
- Request a demonstration of the iPhone functioning, including boot-up and app operations.
- Review return policies or buyer protections offered by the platform or seller.
- Confirm that the product matches the advertised model and specifications exactly.
Comparative Table: Verified vs. Non-Verified iPhones
| Aspect | Verified iPhone | Non-Verified iPhone |
|---|---|---|
| IMEI/Serial Validation | Confirmed uniqueness, clean record | Unknown or blacklisted |
| iCloud Status | Fully unlocked, ready for new user | Locked or linked to previous owner |
| Ownership History | Documented, legitimate purchase | Uncertain or illicit origin |
| Warranty Coverage | Includes remaining manufacturer warranty | No warranty, potentially out of coverage |
| Repair History | Known repairs, authorized service providers | Unknown, possible unauthorized repairs |
| Seller Credibility | Reputable dealer or certified reseller | Individual with unclear credibility |
| Legal Risks | Minimal – ownership clearly validated | High – risk of seizure or blacklisting |
| Device Performance Risk | Low – no tampering or fraud | High – potential hardware/software issues |
| Resale Value | Higher due to verified history | Lower, uncertain provenance |
| Buyer Protection | Available via platform or store policies | Limited or none, risky transaction |
Step-by-Step Guide to Perform a Thorough Provenance Check
- Obtain the iPhone’s serial number and IMEI from the seller—both can be found on the device’s settings under “General > About” or engraved on the SIM tray.
- Access the Apple Check Coverage page (https://checkcoverage.apple.com) and input the serial number to verify warranty status and activation.
- Use local Brazilian IMEI checking services such as the Anatel database or CTIP to confirm the device is not blacklisted.
- Request the seller to erase all content and settings to ensure the iCloud account is removed; verify the device boots to the setup screen.
- Ask for proof of purchase or invoice, ideally linked to an official retailer or authorized distributor.
- Thoroughly inspect physical aspects such as screws, ports, and casing for signs of unauthorized opening or modifications.
- Perform a software inspection checking for operating system anomalies, consistent model specifications, and non-jailbroken status.
- Negotiate a viewing or live demo session where the seller operates the phone to confirm responsiveness and absence of glitches.
- Scan for blocked features or unusual alerts, such as carrier restrictions or warning notifications related to security.
- Before finalizing, agree on a flexible payment method or an escrow service, adding an extra layer of safety to the transaction.
Condição Estética: Avalie a Aparência Geral
When evaluating a used iPhone, especially for demanding professionals such as video editors, musicians, and 3D artists, assessing the Condição Estética or overall appearance is more than just a matter of aesthetics—it can offer insights into the device’s history and potential underlying issues. A clean, well-maintained exterior often reflects careful ownership and lends confidence that the device has been handled properly. Conversely, visible damage may signal past drops, exposure to moisture, or inadequate maintenance, which could impact internal components crucial for performance.
For professionals relying on their iPhones in creative workflows, the physical condition affects usability and the longevity of the device. For example, uneven screen brightness caused by pressures or cracks, loose buttons from falls, or swollen housing from battery issues can interrupt smooth operation. Therefore, a thorough inspection focusing on subtleties in the device’s appearance is essential.
Key Aspects to Examine in the iPhone’s Physical Condition
Start by examining the screen for scratches, cracks, or dead pixels. The display is fundamental for content creation, color accuracy, and touch sensitivity, making its integrity paramount. Use consistent lighting to identify minor screen defects that might otherwise be overlooked, as damaged pixels can distort video editing and graphic applications.
Next, check the body frame, including edges, corners, and the back panel, for dents, scuffs, or paint wear. These signs can indicate falls or improper usage. For audio and video professionals, damage around ports (charging, headphone) can affect connectivity with accessories and peripherals important for daily tasks.
Inspect buttons such as power, volume, and mute switch for firmness and tactile feedback. Dysfunctional buttons can disrupt workflow, especially in time-sensitive environments like live streaming or on-set recording. Also, test the vibration motor by toggling silent mode on and off to ensure haptic feedback works consistently, which is useful in many professional applications.
Assess the condition of the camera lenses meticulously, as scratches or haze on lenses can degrade photo and video quality. A clean lens guarantees sharp images and accurate color capture necessary for photography, cinematography, and content creation.
Checklist for Evaluating iPhone’s Physical Condition
- Check the screen for scratches, cracks, and dead pixels.
- Examine the frame and edges for dents, chips, or paint peeling.
- Look closely at camera lenses for clarity and absence of scratches.
- Test all hardware buttons for proper click and response.
- Inspect charging and audio ports for dirt, damage, or loose fittings.
- Verify the microphone and speaker grills are free from debris.
- Confirm the rear glass or back panel has no cracks or excessive scratches.
- Ensure no swelling or bulging on the body, indicating battery issues.
- Evaluate the device under natural and artificial light for subtle wear.
- Request a hands-on test to feel device ergonomics and detect possible looseness.
Comparative Table: Condition Grades and Their Impact on Device Performance
| Condition Grade | Physical Characteristics | Impact on Performance | Recommended Use |
|---|---|---|---|
| Mint | No scratches, dents, or marks; pristine screen and buttons | Optimal performance and reliability | Professional content creation, critical tasks |
| Good | Minor scuffs and surface scratches; fully functional buttons and screen | Minimal impact; reliable for daily professional use | Freelancers, hobbyist professionals |
| Fair | Noticeable scratches or minor dents; some button stiffness possible | Potential interruptions but usable with caution | Backup device or moderate use |
| Poor | Multiple cracks, dents, or screen issues; hardware may malfunction | Frequent disruptions likely | Not recommended for professional work |
Step-by-Step Guide to Assess the Physical Condition Thoroughly
- Clean the device gently before inspection to remove dust or oil that could mask defects.
- Under good lighting, scan the screen at different angles to spot scratches or dead pixels.
- Inspect all edges and corners for dents or paint loss.
- Check the responsiveness of all buttons and their tactile feedback.
- Look closely at camera lenses, using a magnifying glass if necessary.
- Inspect ports for cleanliness and signs of wear or loose connections.
- Test speakers and microphones with a voice memo or call.
- Feel the weight and balance of the device to detect swelling or internal damage.
- Ask the seller for proof of any repairs or part replacements related to cosmetics.
- Perform a hands-on session to ensure comfort and operational confidence.
Saúde da Bateria: O Coração do Seu iPhone
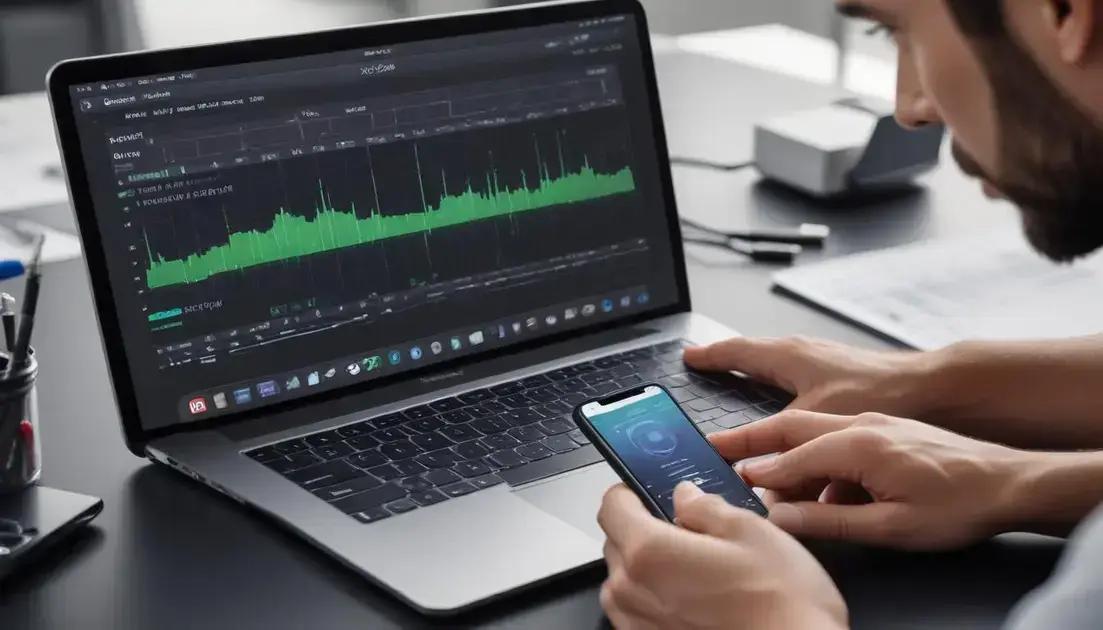
A saúde da bateria é um dos aspectos mais críticos ao avaliar um iPhone seminovo, especialmente para profissionais técnicos como editores de vídeo, músicos e desenvolvedores que dependem de desempenho consistente e confiável. A bateria é essencial não apenas para a autonomia diária, mas também para a eficiência do processador, transferência de dados e execução de aplicativos complexos. Problemas na bateria podem causar desligamentos inesperados, redução da performance e até mesmo danos permanentes ao dispositivo.
Antes de comprar, é vital analisar detalhadamente o estado da bateria para evitar surpresas desagradáveis. Felizmente, a Apple fornece ferramentas para verificar o seu diagnóstico, mas é importante interpretar os dados corretamente para um entendimento técnico preciso. Saber como a bateria opera, o que impacta seu ciclo de vida e como conferir informações técnicas são passos fundamentais para uma compra segura e adequada às necessidades profissionais.
Como a bateria funciona e influencia a performance do iPhone
O iPhone utiliza baterias de íon-lítio, que apresentam alta densidade energética, capacidade para muitas recargas e menor risco de efeito memória. No entanto, seu desempenho decai conforme os ciclos de carga e descarga vão se acumulando. Cada ciclo equivale a uma carga completa de 100% (não necessariamente de única vez), e após cerca de 500 ciclos, a capacidade da bateria pode reduzir consideravelmente.
Quando a capacidade da bateria diminui, o iPhone pode reduzir automaticamente a performance do processador para evitar desligamentos súbitos, um recurso conhecido como gerenciamento de desempenho. Isso impacta diretamente a experiência de usuários que executam aplicativos pesados e tarefas em tempo real, como edição de vídeo ou música.
Além disso, baterias desgastadas tendem a gerar maior calor durante o uso e carregamento, algo que pode prejudicar componentes internos e diminuir a vida útil do aparelho. É essencial que a bateria esteja em boas condições para garantir um funcionamento estável e seguro, especialmente em ambientes profissionais rigorosos.
Aspectos técnicos para avaliar a saúde da bateria de um iPhone seminovo
A Apple disponibiliza um recurso nativo para checar o estado da bateria em “Configurações > Bateria > Saúde da Bateria”. Lá, você encontrará informações como a capacidade máxima em porcentagem e se o recurso de gerenciamento de desempenho está ativo. Uma capacidade superior a 80% indica uma bateria em boas condições, enquanto valores menores podem indicar desgaste significativo.
No entanto, para uma avaliação mais aprofundada, ferramentas especializadas, como o CoconutBattery (para Mac) ou apps de diagnóstico profissional, permitem monitorar fatores adicionais, incluindo ciclos exatos de carga, temperatura da bateria e voltagem. Esses dados ajudam profissionais técnicos a interpretar a real condição do hardware.
Também é prudentemente verificar se a bateria foi substituída por uma peça original ou de qualidade inferior. Baterias não originais podem comprometer a segurança e reduzir drasticamente o desempenho e a duração do iPhone.
Checklist para uma avaliação eficaz da saúde da bateria
- Verifique a capacidade máxima da bateria nas configurações do iPhone.
- Confirme o número total de ciclos de carga do dispositivo usando apps especializados.
- Observe se a opção de gerenciamento de desempenho está ativada, sinalizando desgaste.
- Teste o comportamento do iPhone sob uso intenso para verificar aquecimento excessivo.
- Confira se há mensagens de alerta sobre a bateria no sistema operacional.
- Peça ao vendedor informações sobre substituições ou reparos da bateria.
- Compare o desempenho do carregamento com cabos e fontes originais.
- Avalie o tempo de uso real da bateria e autonomia em testes práticos.
- Observe desconexões inesperadas ou quedas abruptas na carga.
- Considere a possibilidade de trocar a bateria, caso o desgaste seja muito alto e o preço compensar.
Comparativo de saúde da bateria vs desempenho para profissionais técnicos
| Capacidade da Bateria (%) | Status | Impacto em Performance | Recomendação para Usuários Técnicos |
|---|---|---|---|
| 90-100 | Excelente | Performance plena, sem limitações | Ideal para tarefas pesadas e uso profissional intenso |
| 80-89 | Boa | Performance estável, leve gerenciamento | Bom para a maioria dos profissionais, monitorar aquecimento |
| 70-79 | Moderada | Performance limitada, possível lentidão | Atenção ao uso intensivo; considerar substituição |
| 60-69 | Ruim | Desligamentos ou travamentos podem ocorrer | Substituir bateria para garantir estabilidade |
| <60 | Muito ruim | Desempenho fortemente prejudicado | Não recomendada para uso profissional |
Passo a passo para checar a saúde da bateria no iPhone
- Acesse “Configurações” no iPhone.
- Navegue até “Bateria” e depois “Saúde da Bateria”.
- Verifique a “Capacidade Máxima” exibida em porcentagem.
- Observe se há indicação do gerenciamento de desempenho ativado.
- Utilize um app confiável para obter dados aprofundados, como ciclos e temperatura.
- Execute testes de uso contínuo, observando a velocidade de descarga e aquecimento.
- Peça informações ao vendedor sobre histórico de substituição de bateria.
- Confirme o uso cabos e carregadores originais para evitar danos.
- Considere a troca preventiva se a capacidade estiver abaixo de 80%.
- Garanta que o preço do dispositivo compense qualquer investimento em substituição futura.
Tela e Touch: Resposta Perfeita ao Seu Comando
A tela e o sistema de toque (touchscreen) são componentes fundamentais para o uso eficiente de qualquer iPhone, especialmente para profissionais técnicos como desenvolvedores, músicos, editores de vídeo e artistas 3D que dependem da precisão e rapidez nos comandos. Avaliar esses elementos em um iPhone seminovo é essencial para garantir que o aparelho ofereça uma resposta perfeita, sem atrasos, falhas ou áreas insensíveis que prejudiquem a experiência de uso.
A tecnologia touchscreen capacitiva utilizada pela Apple opera através da detecção de alterações no campo elétrico causado pelo toque dos dedos. Essa tecnologia garante alta sensibilidade e precisão, fundamentais para atividades que demandam navegação fluida e controle exato, como edição de áudio e vídeo, manipulação de softwares gráficos e execução de aplicativos de design.
Principais pontos técnicos para avaliar na tela e no touch
Um exame detalhado deve começar pela verificação visual: a tela não deve apresentar rachaduras, arranhões profundos ou manchas que possam interferir na visualização. Além disso, deve-se ficar atento a qualquer descoloração ou pixels mortos — pontos na tela que não respondem, criando manchas pretas, brancas ou coloridas.
Testar a sensibilidade do touchscreen é igualmente vital. Profissionais devem garantir que a resposta ao toque seja imediata e precisa, sem atrasos perceptíveis ou áreas que não respondem ao toque. Testes práticos com múltiplos dedos simultâneos ajudam a identificar falhas no reconhecimento multitouch, importante para operações dentro de aplicativos de criação e edição.
Outro ponto crucial é o brilho e a calibragem das cores da tela. A fidelidade na reprodução das cores é essencial para profissionais de vídeo e 3D, pois a tela precisa refletir com precisão as nuances que serão utilizadas em produções. Testar e calibrar a tela pode evitar erros nas etapas de pós-produção.
Checklist para verificar a qualidade da tela e touch em um iPhone seminovo
- Inspecione a tela em variados ângulos para detectar arranhões e manchas.
- Verifique a presença de pixels mortos usando fundos homogêneos (preto, branco, vermelho).
- Teste a resposta tátil realizando movimentos de swipe, tap e zoom com múltiplos dedos.
- Confirme a uniformidade do brilho e a ausência de áreas esmaecidas ou excessivamente iluminadas.
- Avalie a reprodução de cores comparando imagens reais em alta resolução.
- Teste o modo de bloqueio da tela e funcionamento do botões para ligar/desligar e despertar.
- Verifique se a função 3D Touch (modelos compatíveis) responde adequadamente a diferentes níveis de pressão.
- Confirme que a atualização de taxa de toque suporta a fluidez em jogos e softwares criativos.
- Garanta que a tela não apresenta distorções ao utilizar acessórios de proteção de tela.
- Realize testes com aplicativos gráficos para validar a qualidade da resposta em situações práticas.
Matriz comparativa de tecnologias e condições de telas de iPhones seminovos
| Aspecto | Display IPS | Display OLED (Retina) | Impacto para Usuários Técnicos |
|---|---|---|---|
| Qualidade da cor | Boa | Excelente, superior contraste e brilho | Profissionais de vídeo e edição preferem OLED para melhor fidelidade visual |
| Sensibilidade ao toque | Alta | Altamente responsiva com menor latência | Fundamental para ações rápidas em fluxo de trabalho intensivo |
| Durabilidade | Mais resistente a manchas | Mais suscetível a queima de pixels | Escolha balanceada entre durabilidade e qualidade de imagem para uso prolongado |
| Consumo energético | Moderado | Mais eficiente, prolonga a autonomia | Importante para profissionais em mobilidade intensa |
Passo a passo para testar a tela e o touch do iPhone seminovo
- Ligue o iPhone e navegue pelos menus para detectar lentidão ou falhas de resposta.
- Abra uma imagem branca em tela cheia para identificar pixels mortos ou áreas escuras.
- Realize movimentos com múltiplos dedos para verificar o reconhecimento multitouch.
- Teste o brilho máximo e mínimo, verificando variações e uniformidade.
- Use aplicativos de edição de fotos para confirmar a reprodução correta das cores.
- Avalie a funcionalidade do 3D Touch, se aplicável, pressionando a tela com diferentes intensidades.
- Instale um aplicativo de teste de touchscreen para diagnosticar áreas não responsivas.
- Experimente a digitação rápida e a navegação em jogos para avaliar sensibilidade e fluidez.
- Inspecione fisicamente a tela para garantir ausência de danos exteriores.
- Confirme compatibilidade e ajuste com acessórios de proteção de tela sem comprometer a resposta ao toque.
Câmeras (Frontal e Traseira): Qualidade em Cada Clique
For professionals who depend heavily on imaging technology—such as videographers, photographers, 3D artists, and content creators—the camera quality on a used iPhone is critical. Both the front and rear cameras must be scrutinized to ensure that they meet high standards for clarity, color accuracy, and functionality. Evaluating the Câmeras (Frontal e Traseira) on a second-hand iPhone requires not only a visual inspection but also technical testing to detect issues like lens scratches, sensor malfunctions, or degraded optics that can negatively affect image and video output.
The rear camera system usually includes multiple lenses and sensors designed to deliver versatile shooting modes like wide-angle, telephoto, and portrait. Each element plays a role in delivering professional-grade photos and videos, which is essential for those working in creative and technical fields. Ensuring these cameras function properly guarantees that users can capture high-resolution images and videos with accurate depth and color rendering.
Similarly, the front camera, essential for video calls, streaming, and selfie content, must provide consistent image quality with features like portrait mode and night mode. It also often includes sensors critical for Face ID facial recognition, thus blending security with imaging capabilities.
Technical Parameters to Check in iPhone Cameras
Start by examining the physical condition of the camera lenses. Look for scratches, chips, or dust particles that compromise optical clarity. Even minor scratches can cause lens flare, reduce sharpness, or introduce unwanted artifacts in images.
Proceed to test the camera app functionality. Capture photos and videos in various modes—standard, portrait, night mode, and wide-angle—to verify sensor response and lens versatility. Pay close attention to autofocus speed, color accuracy, and exposure consistency. A malfunctioning sensor may cause blurry images, inaccurate colors, or inconsistent brightness.
Assess video stabilization as well, which is important for smooth footage without jitter, especially for mobile videographers. The front camera should also be tested by recording both selfies and video calls, ensuring clarity and consistent frame rates.
Checklist for Evaluating the iPhone’s Front and Rear Cameras
- Inspect lenses for scratches, dust, or damage under good lighting conditions.
- Test autofocus by switching focus points in both photo and video modes.
- Capture images using portrait mode and evaluate the bokeh (background blur) effect.
- Take photos in low light conditions and check the effectiveness of night mode.
- Record stabilized video footage to assess image stabilization quality.
- Test zoom capabilities (optical and digital) for clarity and sharpness.
- Perform test selfies with the front camera, checking for sharpness and color accuracy.
- Check for the presence and operation of flash, including True Tone and slow sync flash.
- Verify Face ID function, which depends on front camera sensors for secure facial recognition.
- Use third-party camera apps to test additional features and compatibility.
Comparative Table: iPhone Camera Features Across Generations (Example)
| iPhone Model | Rear Camera Setup | Front Camera Specs | Special Features |
|---|---|---|---|
| iPhone 8 | Single 12MP Wide | 7MP | Portrait Lighting (limited), basic stabilization |
| iPhone X | Dual 12MP Wide + Telephoto | 7MP TrueDepth | Portrait Lighting, Face ID, Smart HDR |
| iPhone 11 Pro | Triple 12MP Wide + Telephoto + Ultra Wide | 12MP TrueDepth | Night Mode, Deep Fusion, 4K Video |
| iPhone 12 Pro | Triple 12MP + LiDAR Scanner | 12MP TrueDepth | Dolby Vision HDR, LiDAR for AR |
| iPhone 13 Pro | Improved triple cameras + Sensor-shift stabilization | 12MP TrueDepth | ProRAW, Cinematic mode |
Step-by-Step Guide to Test iPhone Cameras Before Buying
- Clean the front and rear lenses to ensure no dirt or smudges affect results.
- Open the camera app and take sample photos in daylight, focusing on different objects at varying distances.
- Test portrait mode on people or objects to check background blur accuracy and edge detection.
- Try night mode by capturing images in low light, comparing noise levels and details.
- Record video in 4K or highest available resolution, assessing stabilization and smoothness.
- Zoom in and out using optical and digital zoom to verify sharpness throughout.
- Use the front camera to take selfies, testing clarity and color fidelity.
- Test Face ID setup to ensure front camera sensor works correctly for facial recognition.
- Try video conferencing apps or streaming setups to evaluate streaming quality.
- Optionally, use third-party camera apps to explore advanced camera controls and features.
Botões e Conexões: Tudo Funcionando Sem Falhas
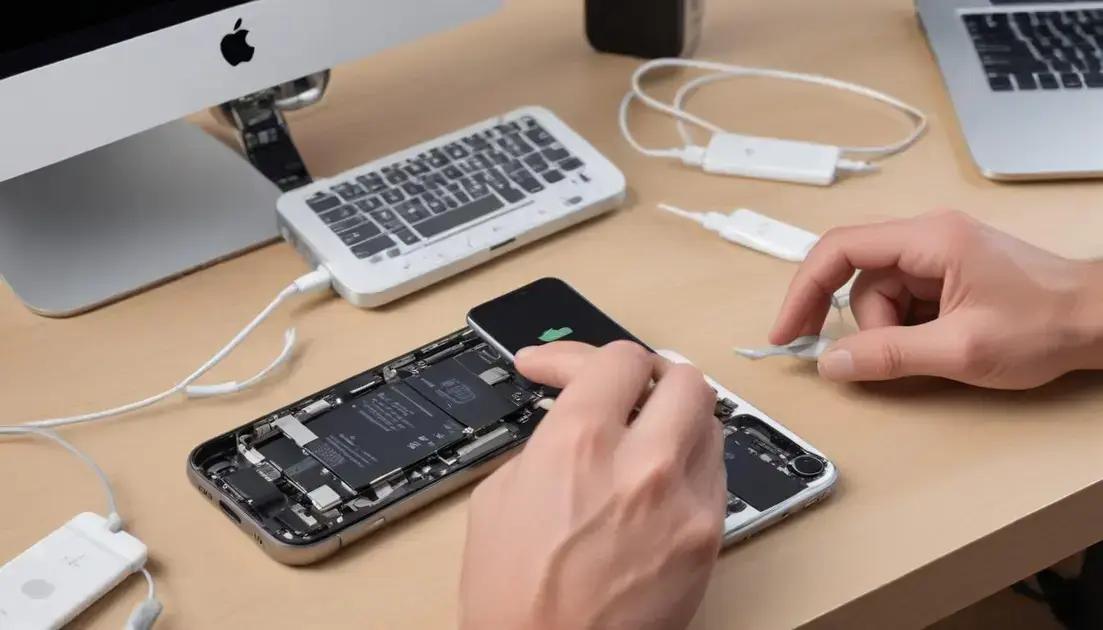
For professionals like video editors, musicians, developers, and 3D artists who rely heavily on their iPhones, the flawless operation of botões e conexões (buttons and connections) is essential. These components are the gateway to basic device control and connectivity with peripherals, making their proper function crucial for productivity and workflow efficiency. Issues such as unresponsive buttons, faulty charging ports, or unstable wireless connections can disrupt essential tasks and delay work processes.
Button functionality includes vital physical inputs such as the power button, volume controls, mute switch, and home button (or Face ID sensors in newer models). Each button should deliver tactile feedback, respond promptly, and endure repetitive use without sticking, lagging, or becoming brittle. For creative professionals, who often operate under time pressure, every button press needs to be precise and instantaneous.
On the connectivity side, a seamless experience requires perfectly working charging ports, audio jacks (where applicable), Lightning or USB-C connectors, as well as wireless technologies like Wi-Fi, Bluetooth, and cellular data. These connections ensure uninterrupted data transfers, accessory use, and internet access. Any instability in these areas can lead to failed file uploads/downloads, poor audio/video streaming, and failed peripheral interactions.
Essential Button and Connection Checks for iPhones
Physical testing begins by pressing each button multiple times to feel the resistance and assess responsiveness. Stiffness, unusual looseness, or failure to activate expected commands should serve as red flags. For example, developers working with interactive apps or hardware controllers require perfect button accuracy for seamless integration.
Charging ports must be inspected for debris, corrosion, or physical damage that could cause intermittent charging or connection failures. An effective test includes inserting compatible cables to check for stability and speed of charge or data transfer. Musicians using MIDI devices or video editors transferring large files should be particularly cautious about port integrity.
Audio ports and speakers also deserve detailed attention. Although newer iPhone models lack a dedicated headphone jack, Bluetooth connections with wireless headphones and adapters rely on stable radio signals. Testing Bluetooth connectivity involves pairing with various devices to confirm consistent audio quality and latency below perceptible thresholds.
Wi-Fi and cellular connectivity can be checked using diagnostic apps that measure signal strength, speed, and network stability. Unstable or weak connections can stall collaborative work, remote uploads, or cloud-based software usage, impacting creative outputs and efficiency.
Checklist for Button and Connection Validation
- Test the power button for immediate response and consistent feedback.
- Operate volume buttons ensuring smooth, precise increments or decrements.
- Toggle the mute switch verifying silent and ring modes switch reliably.
- Press the home button (for Touch ID devices) or check Face ID sensor functionality thoroughly.
- Inspect charging port cleanly for debris and test charge speed with original cables.
- Evaluate Lightning or USB-C connectors for secure cable fit and data transfer speed.
- Test wireless Bluetooth connections on several devices to check range and lag.
- Run Wi-Fi connection speed and stability tests on diverse networks.
- Check cellular network reception and data consistency across multiple providers.
- Inspect microphones and speakers by recording voice memo and playing back audio clearly.
Comparison Table: Common Button and Connection Issues and Impact
| Component | Common Issues | Impact on Professional Use | Recommended Resolution |
|---|---|---|---|
| Power Button | Sticking, unresponsiveness | Inability to turn device on/off, reboot | Repair or replacement of button mechanism |
| Volume Buttons | Stiffness or failure to respond | Issues controlling audio levels in real-time | Cable cleaning, software reset, hardware fix |
| Mute Switch | Loose or non-responsive | Problems managing sound profile quickly | Hardware replacement required in severe cases |
| Charging Port | Loose fit, corrosion, dirt accumulation | Charging failure, slow data transfer | Cleaning or port replacement |
| Bluetooth | Connection drops, pairing issues | Interrupted wireless accessory use | Reset Bluetooth module, update software |
| Wi-Fi | Poor reception, low speeds | Cloud and streaming disruptions | Network settings reset or antenna repair |
| Speakers/Microphones | Static noise, cuts out | Compromised audio recording/monitoring | Cleaning, hardware diagnostics |
Step-by-Step Guide to Test iPhone Buttons and Connections
- Physically press each button multiple times, observing feedback and responsiveness.
- Check mute switch toggling between silent and ring modes, noting any lag.
- Plug in charger cables (original recommended) and observe charging speed and steadiness.
- Inspect charging port with a flashlight for debris; clean carefully if needed.
- Pair Bluetooth devices like headphones or speakers; test audio quality and connection stability.
- Connect to various Wi-Fi networks and run speed tests to assess signal strength.
- Make test phone calls to verify cellular reception and audio quality.
- Record an audio memo to test microphone functionality and playback through speakers.
- Use diagnostic apps to check hardware health and wireless module statuses.
- If any issue is detected, consider professional hardware inspection or repair prior to purchase.
Áudio: Alto-Falantes e Microfones em Ponto
For professionals relying on their iPhones for content creation, streaming, or communication, the quality and functionality of the audio components, specifically the alto-falantes (speakers) and microfones (microphones), are essential. Audio clarity directly influences recording quality, playback accuracy, and live communication effectiveness, impacting workflows for video editors, musicians, podcasters, and developers integrating audio in their projects.
Alto-falantes and microfones in iPhones are designed to deliver balanced, clear sound reproduction. For instance, the speakers employ stereo setups with strategically placed drivers to offer immersive audio, important for monitoring during video editing or live streaming. Microphones use noise-cancellation and directional pickup technologies to isolate and capture voice clearly, even in noisy environments.
When purchasing an iPhone seminovo, thorough testing of these audio components is fundamental. Faulty speakers may emit distorted or muffled sound and compromised microphones could cause weak or noisy recordings. Both issues significantly degrade professional audio work, lowering production values and reducing user satisfaction.
Key Factors Influencing Audio Performance
Speakers can be affected by debris, physical damage, or water ingress, leading to crackling or reduction in volume. Similarly, microphone sensitivity can decay due to blockage or damage to internal membranes. Software configurations and settings also play a role; misconfigured audio profiles or disabled enhancements can mimic hardware failure symptoms.
Technical users must consider both hardware health and software settings during evaluation. Utilizing test recordings, playback tests, and apps designed for audio diagnostics can identify subtle issues. High fidelity in both speakers and microphones is vital for tasks like precise audio monitoring, voiceovers, live commentary, and remote collaboration.
Checklist for Testing iPhone Speakers and Microphones
- Play high-quality audio samples across genres to detect distortion and clarity.
- Adjust volume levels and listen for any crackling or static at different intensities.
- Record voice memos in various environments to test microphone sensitivity and background noise filtering.
- Use third-party audio testing apps to visualize frequency response and detect dead zones.
- Check stereo speaker balance by playing spatial audio or multi-channel content.
- Test microphone pickup for voice clarity during calls and video recording.
- Inspect speaker grills and microphone holes for dust, debris, or physical damage.
- Ensure software audio enhancements are configured correctly (e.g., noise cancellation).
- Verify compatibility and performance with Bluetooth audio devices where applicable.
- If possible, connect to professional audio equipment to test line-level outputs.
Comparative Table: Audio Specifications and Performance Metrics
| iPhone Model | Speaker Setup | Microphone Features | Use Case Suitability |
|---|---|---|---|
| iPhone 8 | Mono speaker, moderate volume | Single microphone, noise suppression | Basic calls, casual recording |
| iPhone X | Stereo speakers, enhanced bass | Multiple microphones, directional pickup | Better for recording and streaming |
| iPhone 11 Pro | Improved spatial stereo | Triple microphones, advanced noise cancellation | Professional audio and video production |
| iPhone 12 Pro | High-fidelity stereo speakers | Microphone array with beamforming | Ideal for studio-quality recording |
| iPhone 13 Pro | Enhanced spatial audio | Advanced microphone system with computational audio | Optimal for high-end audio creation and communication |
Step-by-Step Guide: Evaluating iPhone Audio Hardware
- Clear the speaker grills and microphone openings from dust and debris.
- Play diverse audio tracks to test speaker clarity, volume range, and distortion.
- Record voice memos in quiet and noisy environments, analyzing noise reduction performance.
- Make test calls to assess microphone transmission quality.
- Use audio diagnostic apps for detailed measurements of sound parameters.
- Test audio playback with headphones and Bluetooth devices for consistency.
- Check software settings, ensuring no audio impairments are enabled accidentally.
- Perform stereo balance tests by playing spatial or multi-channel audio files.
- Record videos utilizing both cameras to assess audio capture in different modes.
- Note any irregularities such as crackling, muffling, or intermittent cuts to determine the need for repair or rejection.
Conectividade: Wi-Fi, Bluetooth e Dados Móveis
Connectivity is a cornerstone of smartphone functionality, especially for professionals such as video editors, musicians, developers, and 3D artists who rely on constant access to data, cloud services, and peripheral devices. Understanding the performance of Wi-Fi, Bluetooth, and mobile data (dados móveis) in a second-hand iPhone is crucial to guarantee uninterrupted workflow and seamless integration with various tools and platforms.
Starting with Wi-Fi, a stable and high-speed connection allows rapid file transfers, cloud synchronization, and streaming of high-resolution media. Modern iPhones support Wi-Fi 5 (802.11ac) and Wi-Fi 6 (802.11ax), with the latter offering faster speeds, improved network capacity, and lower latency. A degraded Wi-Fi module can manifest as slow connection speeds, frequent disconnections, or inability to connect to networks—issues that seriously impact data-intensive tasks and remote collaborations.
Bluetooth connectivity enables the pairing with multiple devices such as wireless headphones, MIDI controllers, external microphones, and other peripherals vital to creative and technical professionals. The latest Bluetooth standards (e.g., Bluetooth 5.0) provide higher range, better power efficiency, and faster data throughput. Faulty Bluetooth modules may cause pairing failures, audio latency, or intermittent drops, leading to disrupted sessions and compromised multimedia experiences.
Mobile data (cellular networks) offers on-the-go internet access, critical for field work, live streaming, or communications when Wi-Fi is unavailable. iPhones support technologies like 4G LTE and 5G, providing high-speed data transfer if the hardware and SIM card are fully functional. Checking signal reception and data throughput on different carriers can prevent connectivity bottlenecks that hinder productivity.
Connectivity Testing Checklist for Wi-Fi, Bluetooth, and Mobile Data
- Verify that the Wi-Fi antenna connects swiftly and maintains stable signals on various networks, including 2.4 GHz and 5 GHz bands.
- Test data transfer speeds and compare them with expected speeds for the supported Wi-Fi standard.
- Pair the iPhone with Bluetooth devices such as keyboards, headphones, and MIDI gear to confirm stable connection and responsive controls.
- Check Bluetooth audio latency by testing headphones during playback and video conferencing apps.
- Validate that Bluetooth connections remain steady during extended use and across reasonable distances.
- Insert an active SIM card and test connectivity on cellular networks, ensuring correct carrier recognition and signal strength.
- Perform mobile data speed tests in different locations to evaluate download, upload speeds, and network consistency.
- Check if Wi-Fi calling and VoLTE functions operate correctly for better call quality.
- Observe if any connectivity interruptions or drops occur during simultaneous use of Wi-Fi and Bluetooth.
- Investigate the device’s ability to maintain hotspot functionality to share mobile data with other devices.
Comparative Table of Wi-Fi and Bluetooth Technologies in iPhones
| Technology | Supported Versions | Main Benefits | Professional Impact |
|---|---|---|---|
| Wi-Fi | 802.11ac (Wi-Fi 5), 802.11ax (Wi-Fi 6) | Higher speeds, better handling of multiple devices, reduced latency | Improves large file transfers and streaming quality |
| Bluetooth | 4.2, 5.0, 5.3 | Extended range, faster data rates, lower power consumption | Stable peripheral connections, enhanced audio experiences |
| Mobile Data | 4G LTE, 5G | Faster internet on the go, lower latency for communications | Enables remote access to cloud services and live streaming |
Step-by-Step Guide to Check Connectivity on a Used iPhone
- Connect the iPhone to known Wi-Fi networks, including both 2.4 GHz and 5 GHz bands; test connection speed using apps like Speedtest.
- Toggle Wi-Fi on and off to check for stability and detect potential dropouts.
- Pair the device with various Bluetooth peripherals ensuring quick pairing and low latency audio playback.
- Test Bluetooth transfer speeds and range by moving away from the paired device and checking for stability.
- Insert a valid SIM card and confirm correct carrier recognition and network registration.
- Make test calls and send messages over mobile networks to verify signal clarity and data delivery.
- Use mobile data to perform download and upload speed tests in different areas.
- Try using Wi-Fi calling if supported by the carrier and device.
- Simulate a mobile hotspot sharing connection and test its reliability with other devices.
- Document any disconnections, delays, or unusual behavior during all connectivity tests for further analysis.
iCloud e Bloqueio de Ativação: O Ponto Mais Crítico!
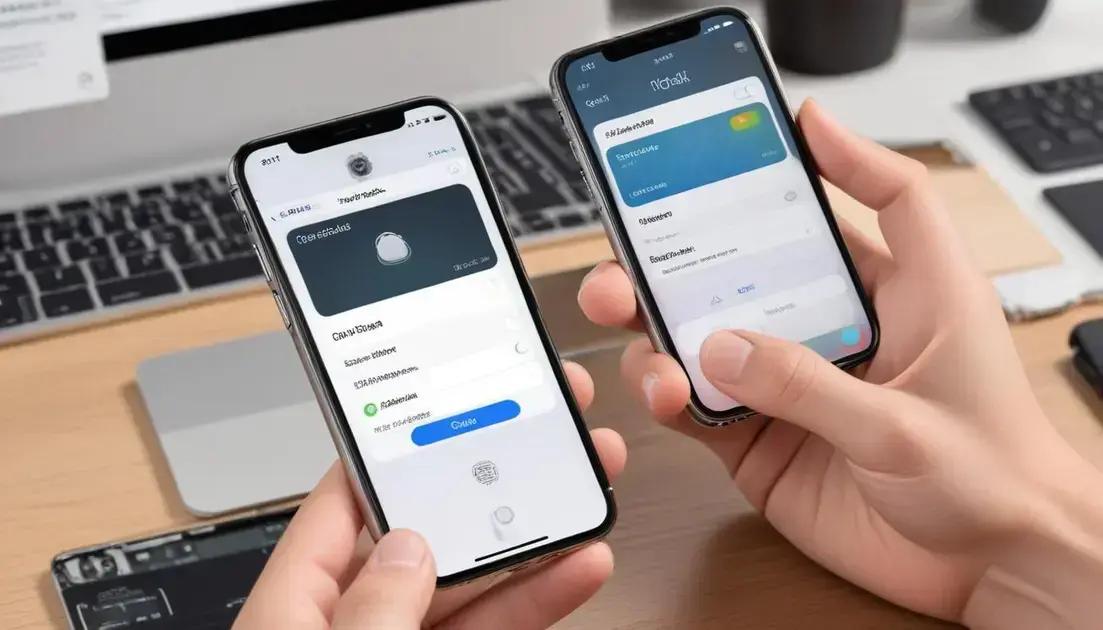
When purchasing a used iPhone, especially for professionals such as video editors, musicians, developers, and 3D artists, understanding the iCloud and Activation Lock status is paramount. This feature, designed by Apple to deter theft and unauthorized use, can become the biggest obstacle if the device is locked to a previous owner’s Apple ID. Activation Lock prevents anyone other than the owner from using the iPhone, making it impossible to fully access the device without the original credentials. In short, verifying iCloud and Activation Lock status is essential before closing the deal.
Activation Lock activates automatically when “Find My iPhone” is turned on via the iCloud account. It binds the device to the owner’s Apple ID, requiring this information to reset, erase, or reactivate the iPhone. Unfortunately, many fraudulent sellers attempt to sell iPhones still locked with a previous owner’s Apple ID, resulting in devices that are essentially unusable. For professionals who rely on their equipment day-to-day, investing in such a device means a complete loss of time and money.
Checking the iCloud and Activation Lock status doesn’t just protect you from buying a stolen device; it also ensures that the phone is not associated with any legal issues such as theft claims. Many marketplaces have strict policies verifying this data, but private sales are riskier. Thus, a technical understanding of how to verify this status is crucial for avoiding scams and ensuring that your iPhone will be functional and secure.
How to Verify iCloud and Activation Lock Status
Apple used to offer a tool for checking Activation Lock via IMEI or serial number, but this was discontinued for security reasons. However, buyers can still perform vital steps manually. The safest way is to request the seller to perform a factory reset on the device in front of you. During setup, the device will ask for the Apple ID and password originally linked to the phone if Activation Lock is still enabled.
To check iCloud status before purchase, ask the seller to:
- Log into the iPhone
- Open “Settings” > tap the owner’s name (Apple ID)
- Verify if “Find My iPhone” is enabled
If the phone requires the account password during a reset or still has Find My iPhone enabled, the device is locked.
Additionally, buyers should check the device’s IMEI or Serial Number by dialing *#06# or accessing “Settings” > “General” > “About”. Use this information with services that verify blacklist or theft reports, which often also provide indirect clues regarding iCloud lock.
Checklist to Avoid Apple ID or Activation Lock Issues
- Always request the seller to remove their Apple ID from the device.
- Verify “Find My iPhone” is turned off prior to purchasing.
- Check the device status by restarting and attempting a factory reset.
- Confirm owner identity and ask for proof of purchase.
- Use the phone in your presence to complete setup and confirm no lock prompts appear.
- Check the IMEI in official or reputable third-party databases to detect blacklisting or theft claims.
- Be wary of prices too low to be genuine, often a sign of locked or stolen devices.
- Avoid selling platforms without buyer protections on iCloud lock status.
- Inquire about the iPhone’s repair and reset history, especially if refurbished.
- Use official Apple support for guidance on Activation Lock issues.
Comparative Table: iCloud Lock Status and Implications
| Status | Description | Implication for Buyer | Recommended Action |
|---|---|---|---|
| iCloud Locked | Find My iPhone enabled, device linked to an Apple ID | Cannot reset or use without owner credentials | Do not purchase or ensure owner removes lock |
| iCloud Unlocked | Find My iPhone disabled or device disassociated from account | Safe to reset and use | Proceed with purchase after verification |
| Blacklisted (IMEI) | Reported lost, stolen, or unpaid bills | Carrier/block service limitations | Avoid purchase unless issue resolved |
| Clean | No reports of theft or lock issues | Device is usable on networks and unlocked | Safe for professional use |
Step-by-Step Guide to Verify iCloud and Activation Lock Before Purchase
- Request the seller to unlock the device from their Apple ID and disable “Find My iPhone”.
- Obtain the IMEI or serial number by dialing *#06# or navigating to settings.
- Confirm the device is not iCloud locked by performing a factory reset and checking for Apple ID prompts.
- Use IMEI checking services to verify blacklist or theft status.
- Verify the seller’s identity and request proof of original purchase.
- Test device activation in your presence to ensure no lock screens appear.
- Ask if the device has been refurbished or repaired and check for related locks.
- Use Apple’s official support channels if any uncertainty remains regarding lock status.
- Avoid devices listed significantly below market prices without proper verification.
- Finalize the purchase only after full confirmation that the device is unlocked and ready for use.
Sensores e Funções Específicas: Face ID, Touch ID e Mais.
High-end iPhones offer a suite of advanced sensors and specialized functions designed to enhance security, usability, and interactivity. For professionals such as video editors, musicians, developers, and 3D artists, features like Face ID, Touch ID, gyroscopes, accelerometers, and ambient light sensors are not just conveniences—they can influence workflow efficiency, security protocols, and user experience in meaningful ways.
The Face ID technology uses a TrueDepth camera system, which combines infrared sensors, flood illuminators, and dot projectors to create a detailed 3D map of the user’s face. This biometric authentication method offers a secure and fast way to unlock devices, approve payments, and access sensitive apps. For professionals, Face ID allows seamless access without interrupting creative work, reducing friction compared to traditional passcodes.
On models that support Touch ID, fingerprint recognition serves as a reliable alternative biometric method. It works through an embedded fingerprint sensor, typically located on the home button or the power button in recent models. Touch ID provides quick unlocking and app authentication, which is especially beneficial when wearing gloves or in environments where face recognition is less effective.
Beyond biometrics, several sensors enhance the iPhone’s contextual awareness. The accelerometer detects device orientation and movement, crucial for gaming, augmented reality (AR) applications, and video stabilization. The gyroscope complements this by measuring angular velocity, enabling precise motion tracking—vital for 3D models manipulation, animators, and immersive VR experiences.
The ambient light sensor adjusts the screen brightness dynamically to save battery and reduce eye strain. It also maintains display readability in diverse lighting environments, which is essential for outdoor shoots or studio editing. Other sensors like proximity sensors prevent accidental screen touches during calls and help optimize battery consumption.
Checklist for Testing iPhone Sensors and Specialized Functions
- Test Face ID by setting up facial recognition and unlocking the device multiple times under different lighting conditions.
- Evaluate Touch ID responsiveness by adding multiple fingerprints and verifying quick and accurate recognition.
- Use apps that leverage the accelerometer and gyroscope to confirm precise orientation detection and motion tracking.
- Verify ambient light sensor by moving the device between bright and dark environments and observing screen brightness adjustments.
- Test proximity sensor functionality by making phone calls and checking if the screen turns off when close to the ear.
- Ensure haptic feedback works in conjunction with sensor triggers (e.g., Face ID success confirmation).
- Verify that biometric data resets completely after factory reset or when setting up a new user profile.
- Check for firmware updates that enhance sensor performance or fix known issues.
- Test multi-user support when applicable, e.g., Face ID with alternate appearance.
- Monitor battery consumption related to sensor activity using diagnostic apps.
Comparative Table: Sensors and Their Impact on Professional Use
| Sensor / Function | Description | Professional Benefits | Common Use Cases |
|---|---|---|---|
| Face ID | 3D facial recognition via infrared and dot projector | Fast, secure authentication without interruption to workflow | Device unlocking, app authentication, secure payments |
| Touch ID | Fingerprint sensor using capacitive touch | Quick biometric access; useful in conditions Face ID can’t function | Authentication, device unlocking, app access |
| Accelerometer | Detects device orientation and motion | Enables AR applications and smooth video editing control | Gaming, video stabilization, AR, motion-based controls |
| Gyroscope | Measures rate of rotation | Enhances motion tracking precision in 3D and VR workflows | 3D modeling, virtual reality, immersive content creation |
| Ambient Light Sensor | Measures surrounding light intensity | Optimizes display brightness and reduces eye strain | Screen brightness adjustment, battery saving, outdoor usability |
| Proximity Sensor | Detects nearby objects to disable unwanted inputs | Prevents accidental touch during calls; conserves battery | Call handling, screen on/off control |
Step-by-Step Guide to Test iPhone Sensors and Specialized Functions
- Set up Face ID under different lighting conditions; test unlocking with sunglasses, hats, or partial face covering.
- If available, add fingerprints to Touch ID; test quick and accurate recognition across stored prints.
- Open AR or motion-based apps to validate accelerometer and gyroscope responsiveness and accuracy.
- Change light environments and observe automatic screen brightness adjustments.
- Make calls and test screen behavior as device is moved closer and away from your ear.
- Check haptic feedback on biometric unlocks and other sensor-triggered events.
- Reset biometric data and verify re-setup process without data bleed.
- Check for available system updates for sensor drivers and firmware.
- Test alternate Face ID appearances if used, ensuring recognition efficiency.
- Use battery monitoring apps to analyze sensor-related power consumption during daily routines.

